Category: My Creative Chaos

  • Resin: Why Can’t I Find a J?

    And Other Sparkly Victories

    I wasn’t planning to sort the entire alphabet, but you know how it goes. One minute you’re staring into a tube of glitter letters, trying to find a J, and the next you’re hunched over with tweezers, sorting out the entire English language like you’re prepping for glitter spelling bee season. And honestly? I didn’t hate it.
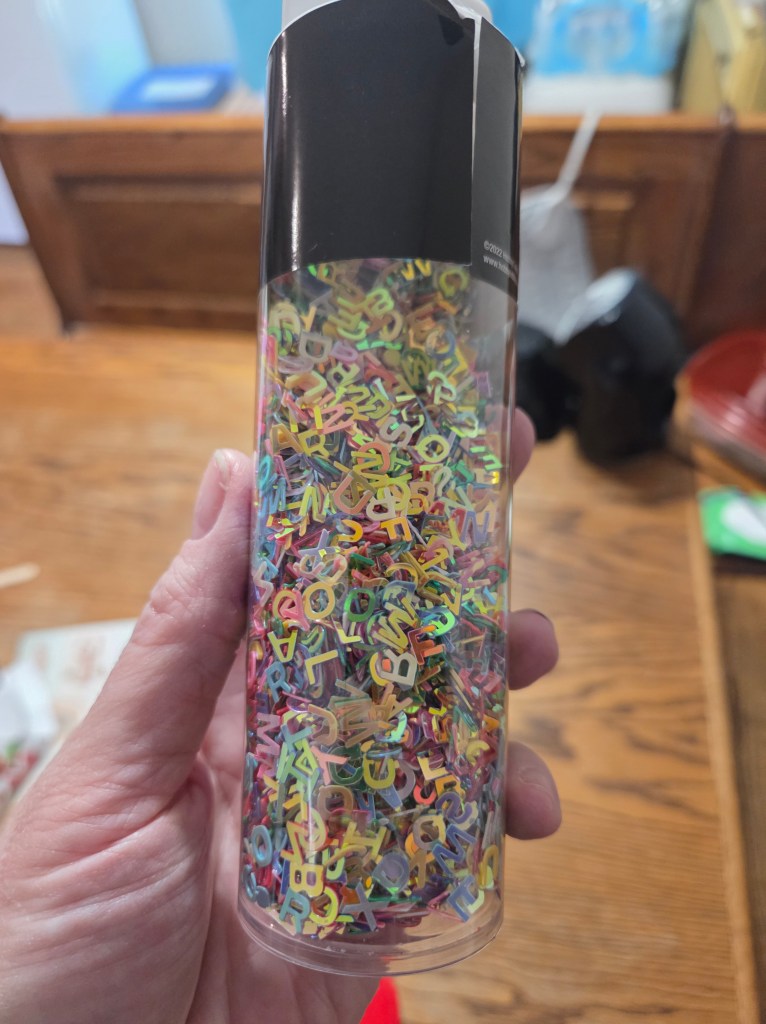
    I saw the tube of alphabet glitter at Hobby Lobby—just one of those “Ooh, that would be fun in resin” moments. I decided to try using the letters to make earrings. Long rectangle molds, some resin, and little letters floating inside like magic. I made a pair for Sarah—one earring with her name, the other with Drue’s. They turned out so pretty.
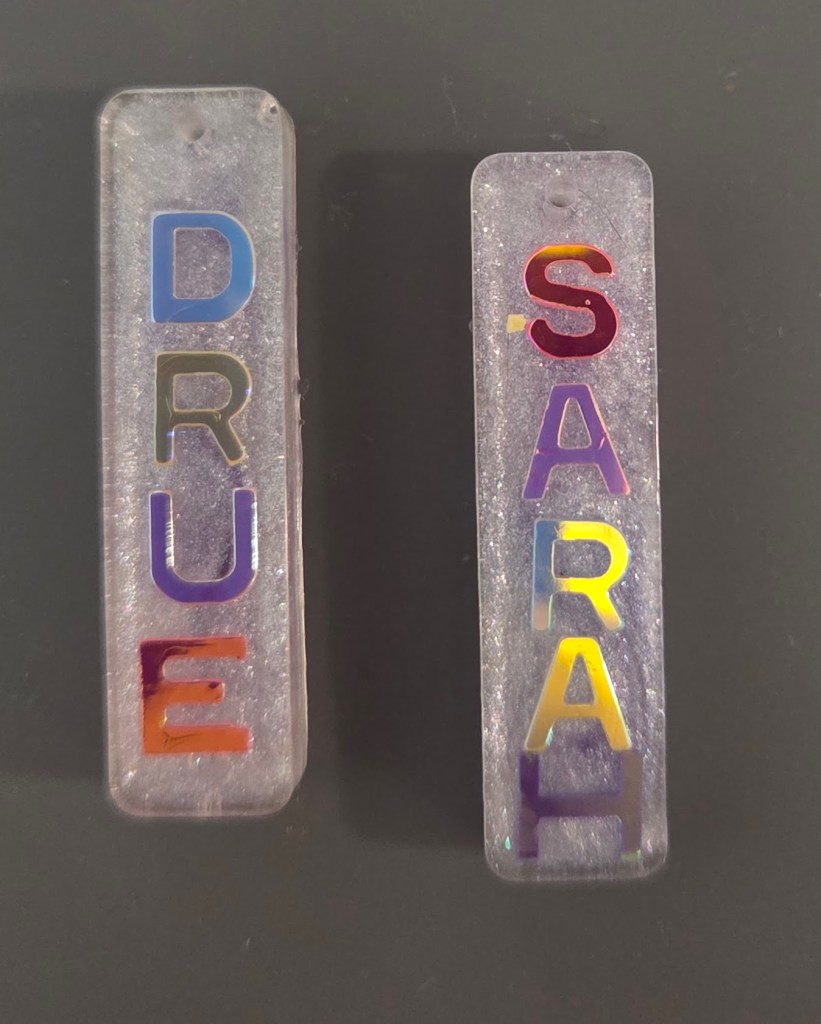
    So I thought, okay, let’s do another set: Aubrey on one, Jarod on the other.

    Except… no J.

    So I started sorting the alphabet to find one. It was actually kind of relaxing. I pulled out some little paper cups, grabbed my tweezers, and even after I found the J’s (little punks), I kept sorting. It became its own little project.
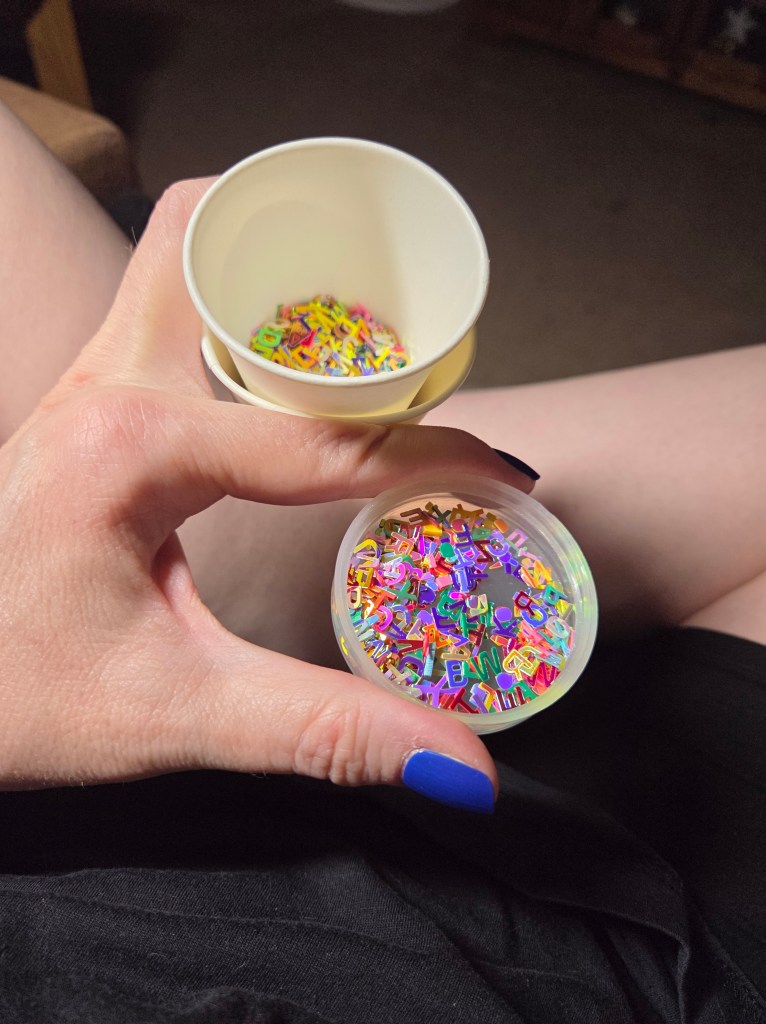
    A few days later, my alphabet keychain molds came in—finally. I’d been wanting to make some, so the second I opened them, I sat down and got to work. I already had a bunch of the glitter letters sorted, and I had this idea ready to go. I started pouring, and everything just clicked. One of those rare sessions where nothing goes wrong and everything cures the way it’s supposed to.

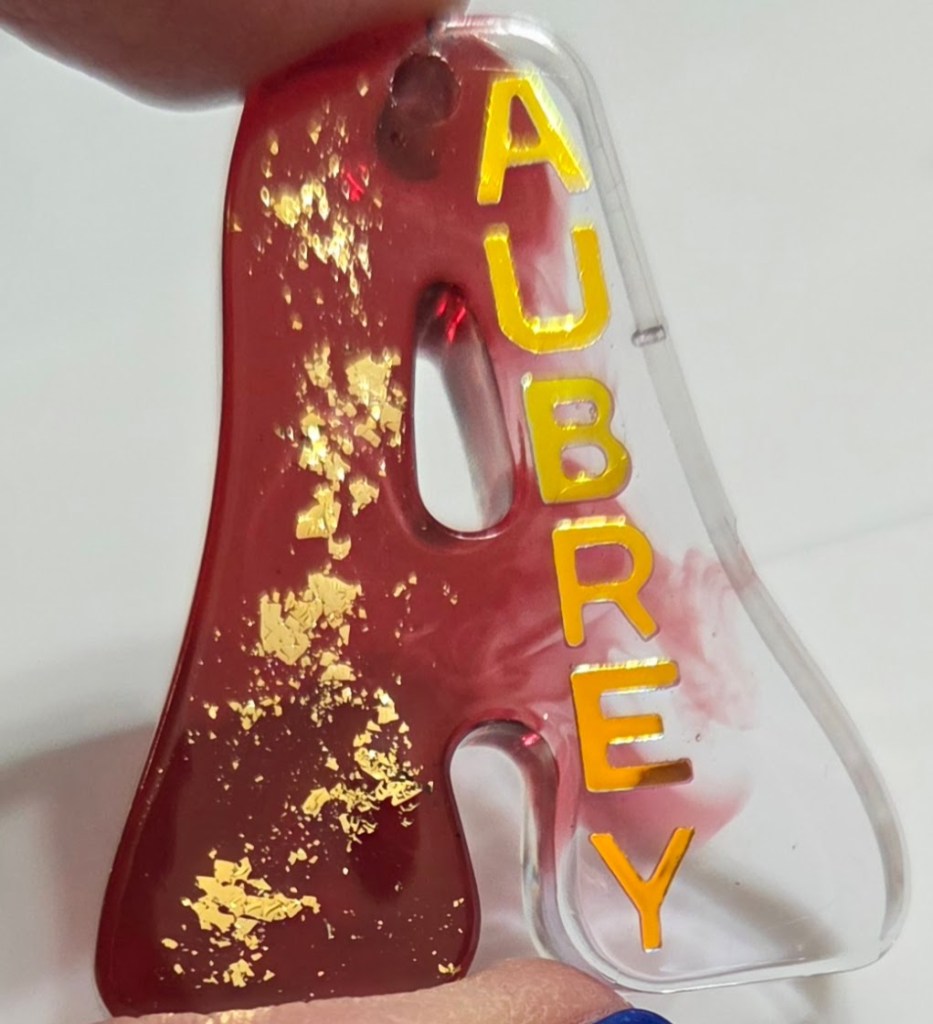
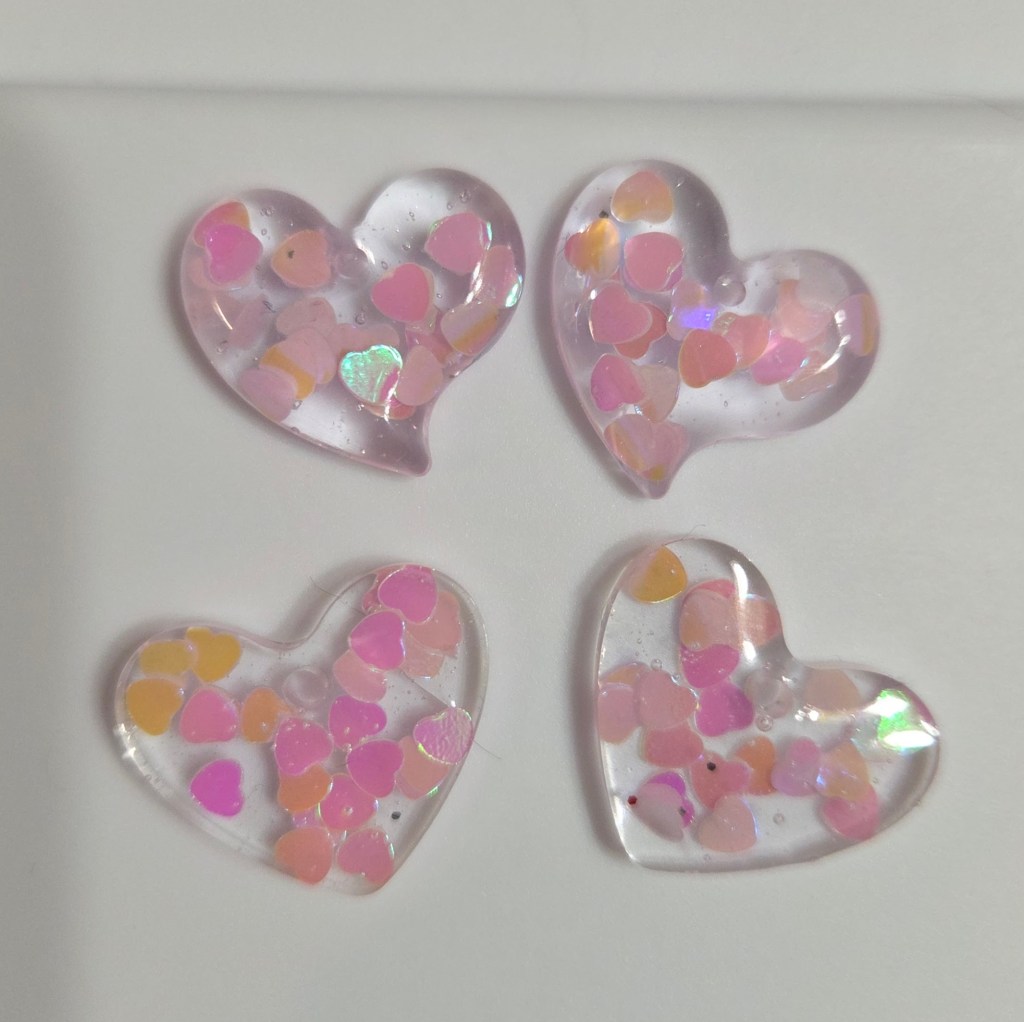
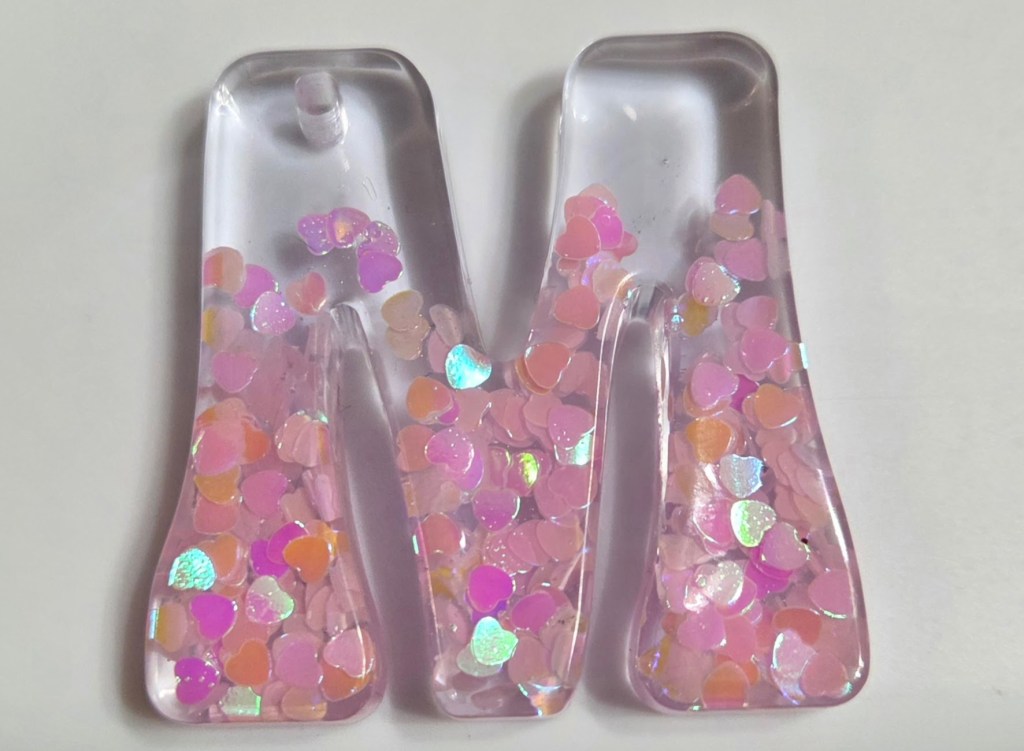
    I made an A for Amber and spelled my name inside with the glitter letters. It came out perfect. Then I made Sarah and Aubrey. I also made a letter M with pink heart glitter, and oh my God, it was beautiful. I even used some of the same pink hearts to make a pair of heart-shaped earrings—those turned out just as pretty.
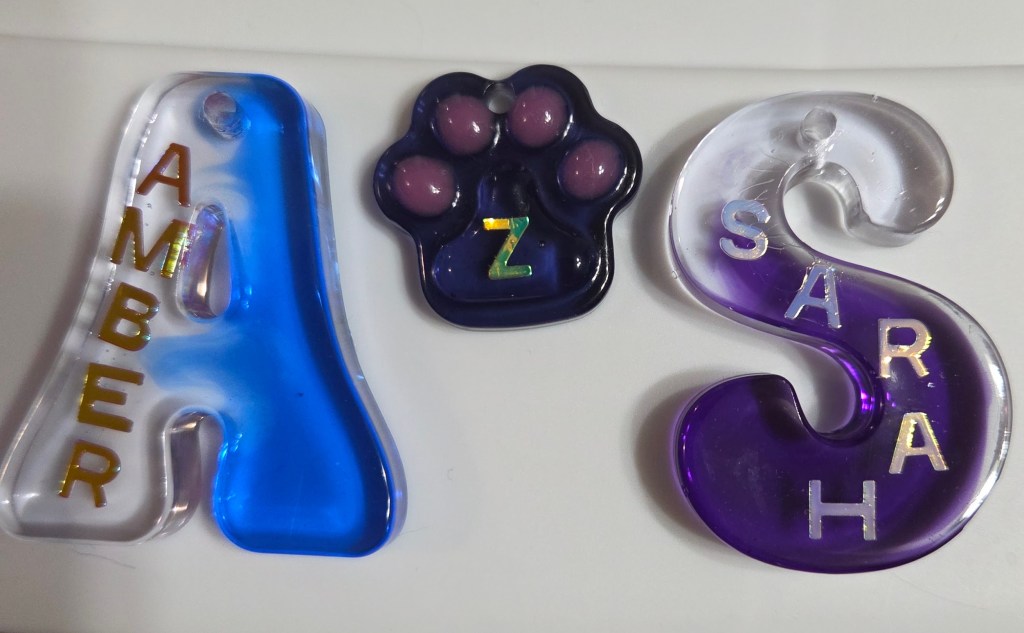
    And on the same mold tray, there was a paw print. So I made one of those too. Black resin, pink toe beans, and a letter Z in the center—for Zazu, Zuri, Zephyr, and Zorro. All black cats, all names starting with Z. The design worked exactly how I pictured it, and I stopped there. I didn’t want to mess up a perfectly good pour day.

    The next day, I decided to make some heart-shaped earrings—because Valentine’s Day is creeping up, and if I’m ever gonna get my stuff listed on Etsy, I’ve got to start somewhere. I mean, let’s be honest, I haven’t attached a single finding yet, but that’s a problem for Future Me. Present Me was feeling ambitious and full of glitter.

    I’d used pink heart glitter the day before, and it came out really pretty. In the same container, there were also red heart glitters, so I thought, great—red hearts, Valentine’s, whole theme. Let’s go.

    That’s when the glitter betrayed me.

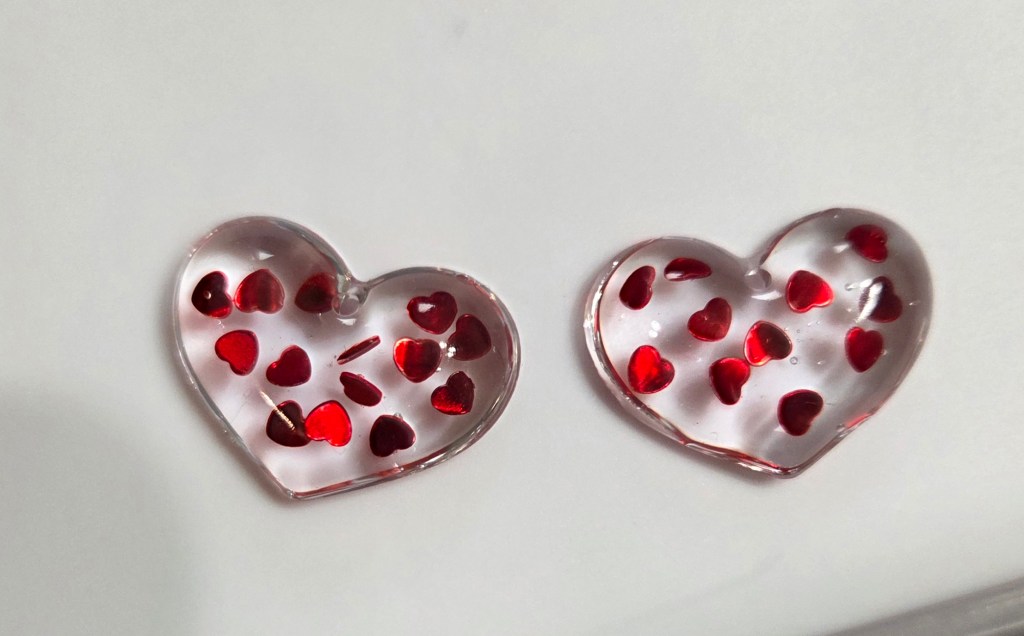
    As soon as the resin touched some of those red hearts, the dye started bleeding. Instantly. The red ran off the glitter like it was trying to escape, and it looked horrible—cloudy, streaky, weirdly bruised. Not the aesthetic I was going for.

    So I got creative. I poured a super thin clear layer of resin and cured it. Then, one by one, I placed the red hearts with tweezers, added another thin layer of resin, and cured it again. Then I did it all over one more time.

    It looked better—but it was taking forever. These earrings were shaping up to be about $400 a pair if we’re counting time and sanity. And the red still kept bleeding just enough to be annoying.
    That was the moment I tapped out. That session officially went on pause. I’ll revisit it once I’ve forgiven the red hearts.

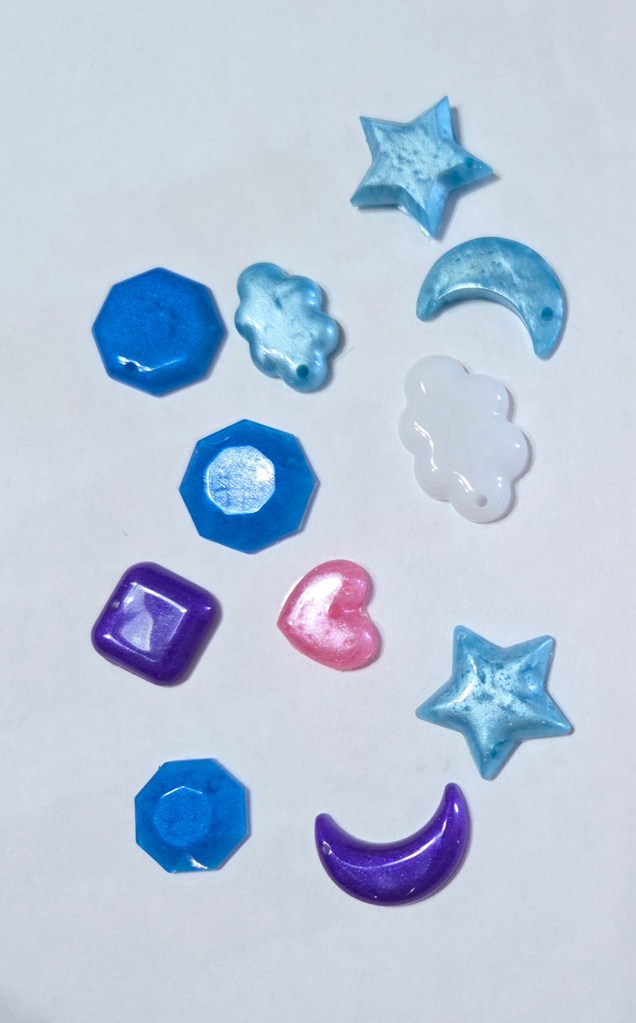
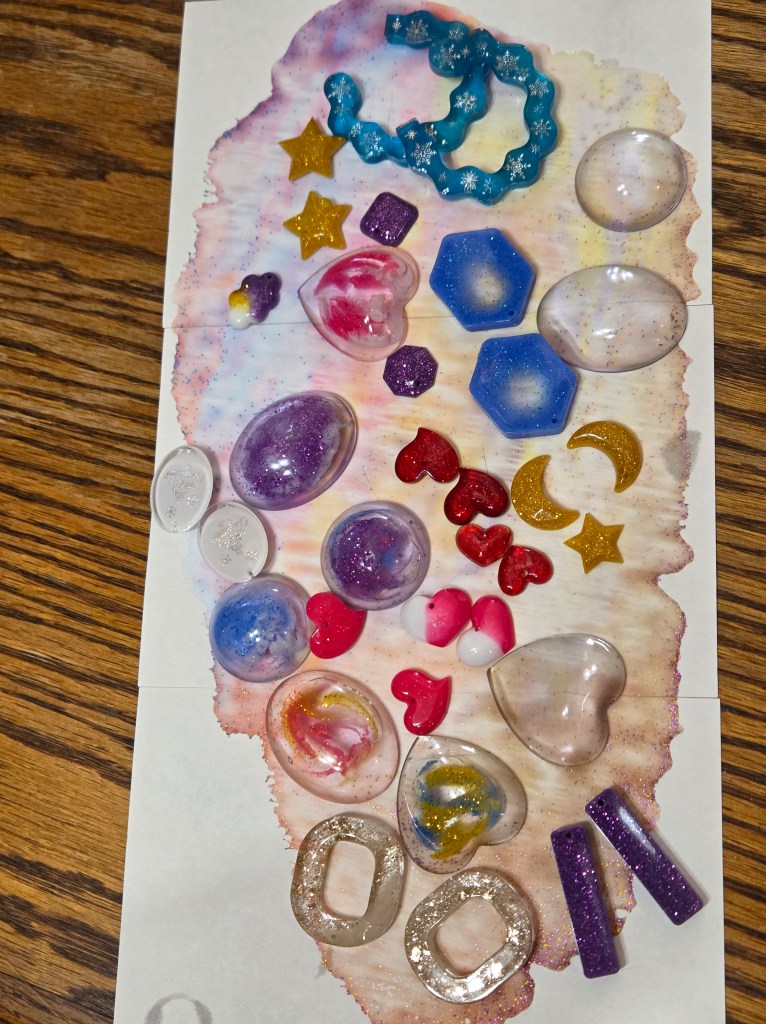
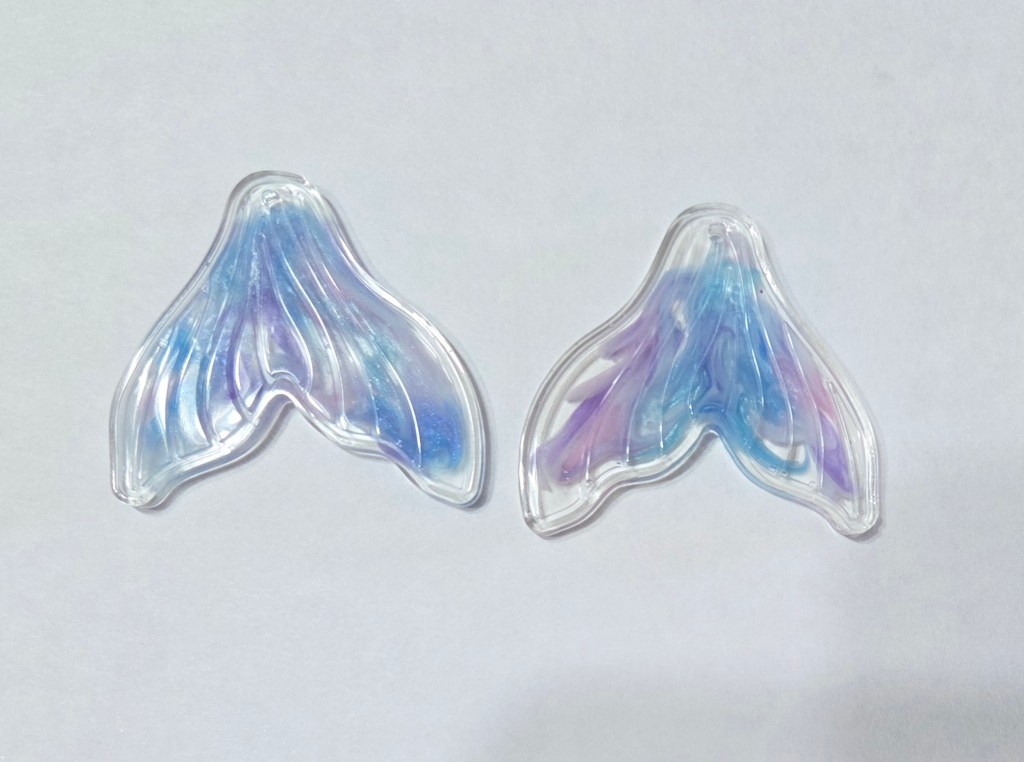
    After the Great Bleeding Heart Incident, I needed a break. So I pulled out my gallon-sized bag of finished resin pieces—the ones I’ve been tossing in for weeks, fully intending to “deal with them later.” Well… later showed up.

    First, I tossed the ones I knew I’d never actually use—the earliest pours and experiments that taught me what not to do. I originally saved them so I could look back one day and be proud of how far I’d come, but nope. Some things are better off in the trash.

    Then I sorted through the rest. Some of it was just okay. Some of it was Etsy-worthy. I pulled out the decent ones, grabbed my stash of hooks, jump rings, and earring findings, and started finishing everything up. I got a bunch done and felt mildly accomplished. I didn’t pour anything new for a few days—just needed to regroup.

    Then yesterday, I had a brilliant idea. Or at least it felt brilliant: red pepper flakes in resin. (Has this been done before?) I don’t have any dried flowers or pretty garden goodies over here, so I grabbed the pepper flakes and started looking around my kitchen for other leafy or interesting things to use.

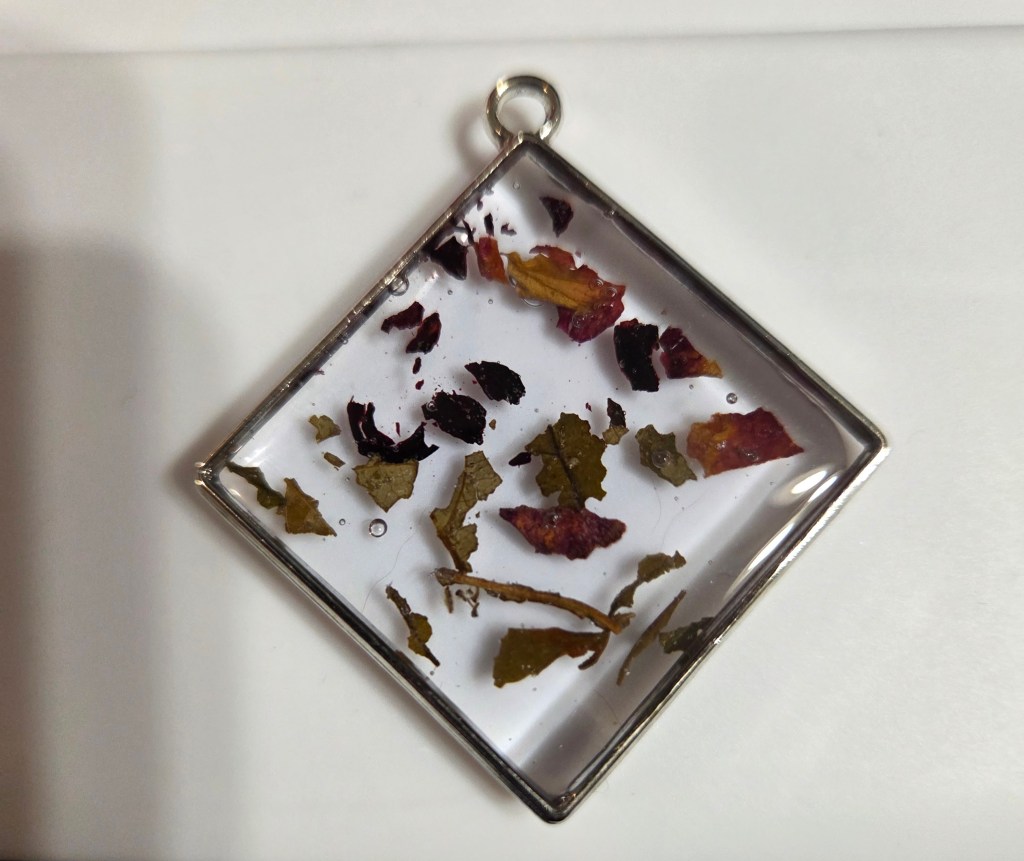
    That’s when I remembered the loose-leaf tea. I have so much tea, and some of it had been hiding in the back of the cabinet for a couple of years. The tea itself was perfect—beautiful little dried petals, herbs, and fruity bits. So I grabbed a few and pulled out my open-back bezels.

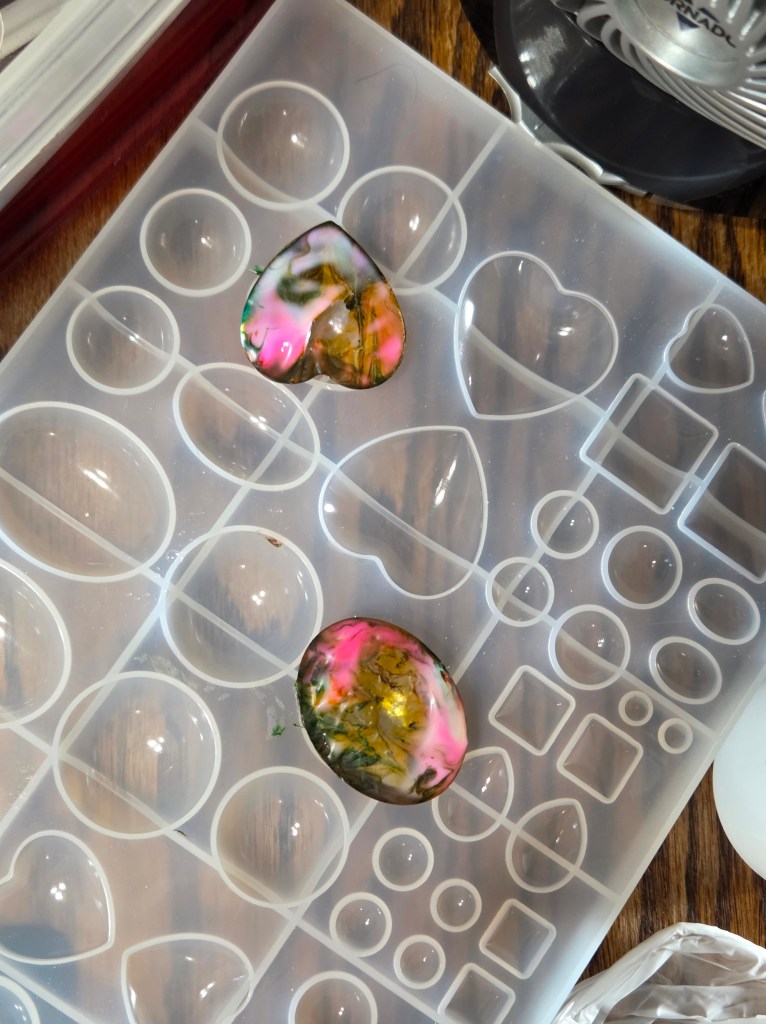
    I decided to use hearts for the pepper flakes—seemed appropriate for Valentine’s Day. Everything looked great at first, until the bubbles started showing up. They’d been hiding under the tea and pepper flakes, then rose up under the UV lamp. One of the hearts came out near perfect—except when I tried to dome it, it overflowed. The second heart had a couple of bubbles—still beautiful—but when I domed that one, it overflowed just enough to fill the ring at the top. I’ll drill that out later.
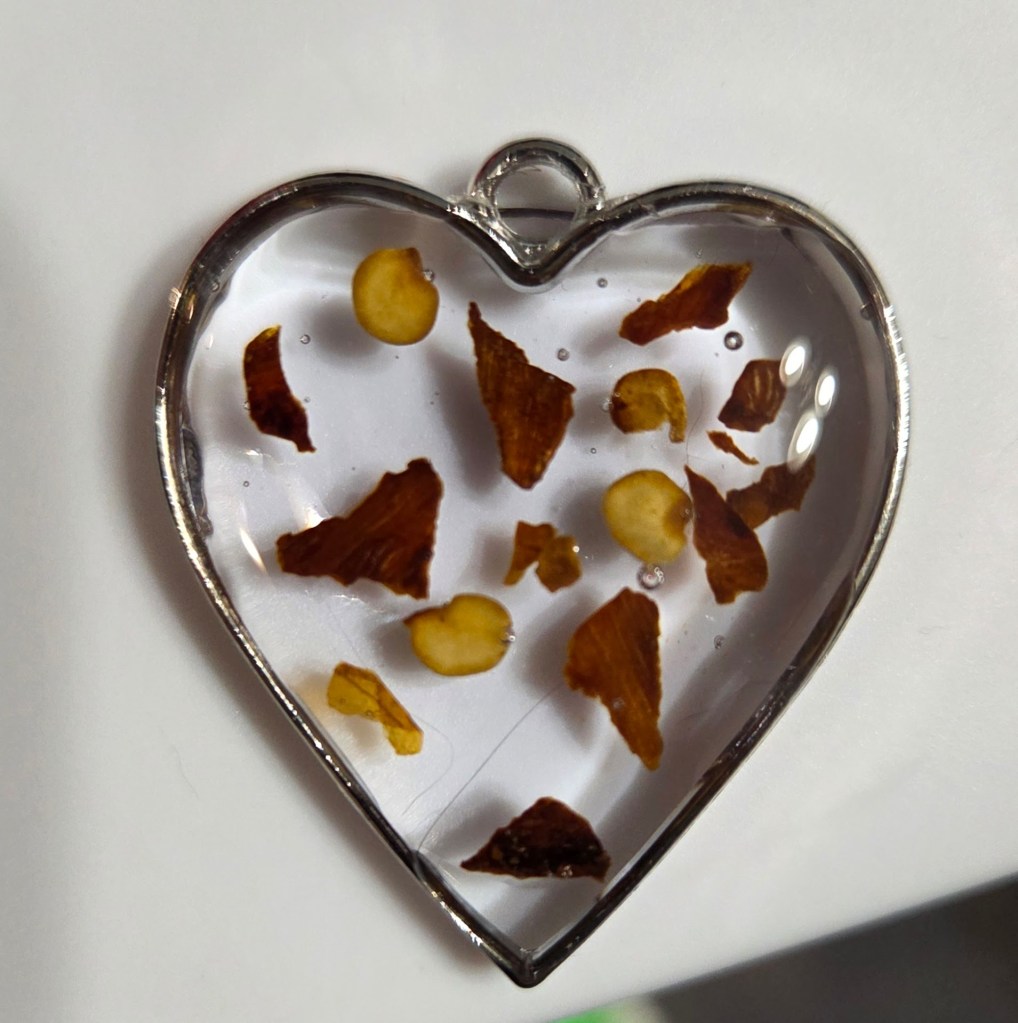
    The other piece was a diamond shape, and that’s the one I put the tea in. It had the most bubbles, but it’s still gorgeous. I just wish I’d caught those bubbles earlier, because that one’s a really beautiful pendant.
    So yeah, that’s where I’m at in my resin journey right now. It’ll probably be a little while before I pour again—I’ve had a special request to do a cross-stitch project for Drue and Sarah’s wedding, and I’m also working on a knitting project for my other daughter-in-law. Resin might have to take a backseat for a bit… at least until I get tired of stitching and knitting.
  • A Resin Hot Mess

    Sooooo, I decided to try resin.
    Not because I needed a new hobby.
    Not because I could afford it.
    But because my brain said, “This looks fun and harmless.”
    My brain was… optimistic. 

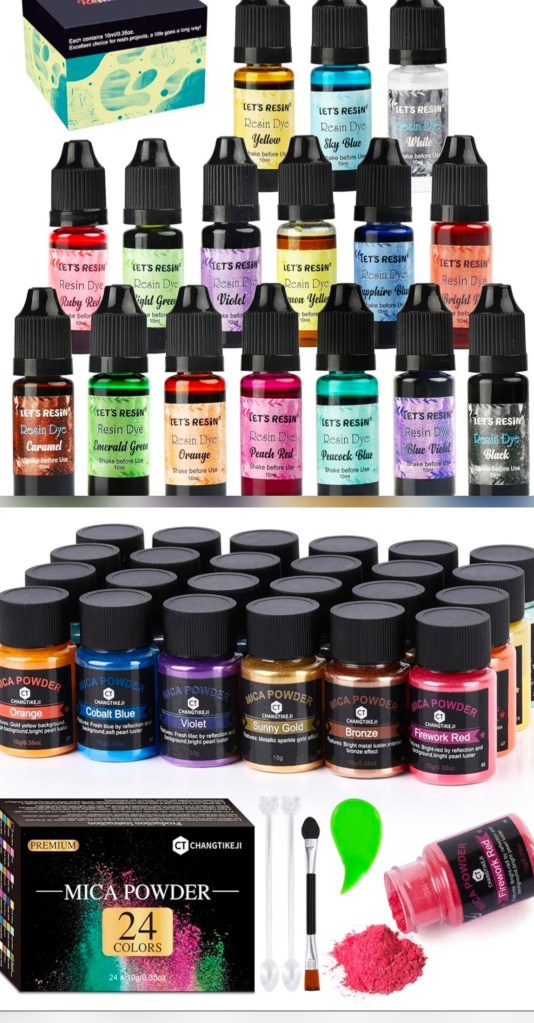
    I watched a bunch of Daniel Cooper videos, nodded along, and decided I was ready. I already had a UV light from doing my nails, so UV resin felt like a reasonable place to start. I bought a couple of molds, silicone mats, mica powders, and some inks, fully convinced I was about to be a pro. 

    For my very first project, I went straight for a tiny monogram mold—an “S.” In my head, I was going to make earrings for my daughter-in-law as a gift. It was an ambitious choice for a first attempt. I tried coloring the letter with mica powder and then filled it with clear UV resin mixed with glitter. The mold itself worked fine, but my technique didn’t. I used too much glitter, the color choice was wrong, and the letter almost disappeared completely. It was a quick lesson in how unforgiving small, detailed molds can be when you’re brand new to resin. 

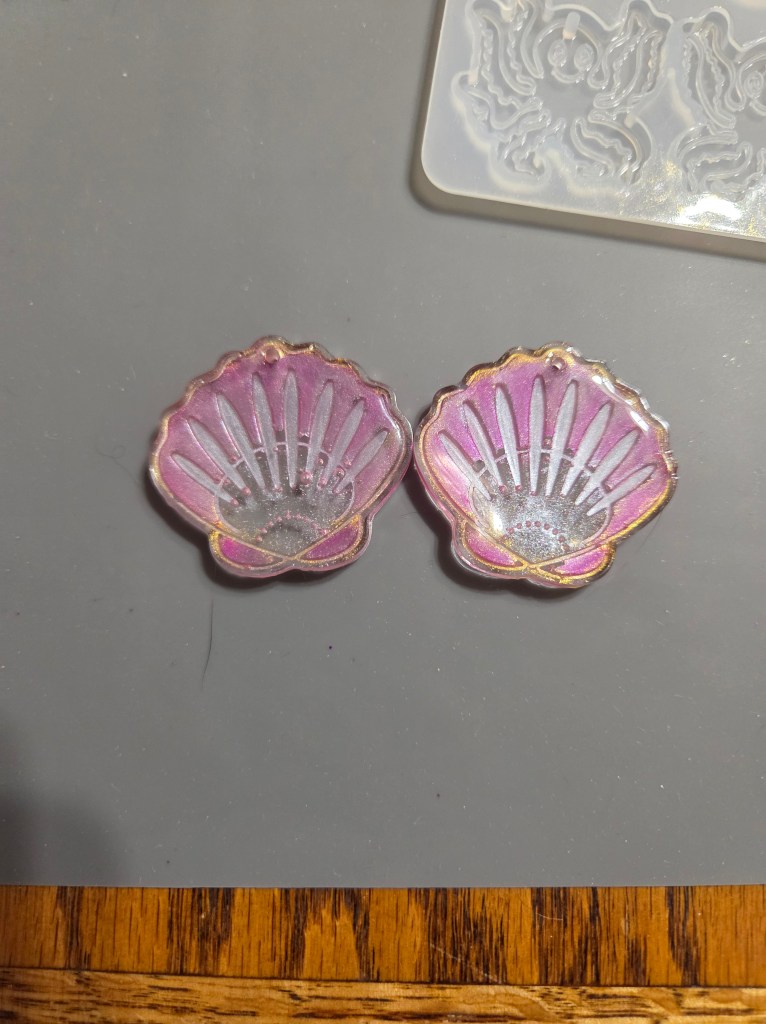
    For my second attempt, I made seashells. I brushed mica powder into the ridges and details, cured them, and was pleasantly surprised. They weren’t perfect, but they actually looked like seashells, which felt like a step in the right direction and a small win worth celebrating. 

    After that, I decided to try a technique I’d been curious about from the beginning. I had seen Daniel Cooper do this thing where he pours glue, swirls color into it, dips a cabochon into the pattern, lets it dry, and then seals the whole piece in resin. It looked simple enough.

    My first attempt did not go so well. I poured the glue, added the color, swirled it around, and dunked the cabochon I had made—without thinking through the very important detail of how I was going to get it back out. The glue was wet, the cabochon was slippery, and I ended up with glue all over the place. By the time I got it out, parts of the pattern had been wiped away completely where my fingers had slid across the bottom. The whole thing was a sticky, smeared mess. I wiped it clean and moved on.

    After rewatching the videos, I realized I had missed a very important step: letting the glue dry a bit before dipping anything into it. So I tried again. This time I poured the glue, added the colors, swirled them around, and then set everything aside until the next day. The results were better. The pattern transferred, although the colors were a little muddy in places. I liked it more than my first attempt, but not enough to keep it. Once the glue dried, I peeled it off the back, leaving me with a collection of clear cabochons waiting for me to get better at this resin thing before I try again.

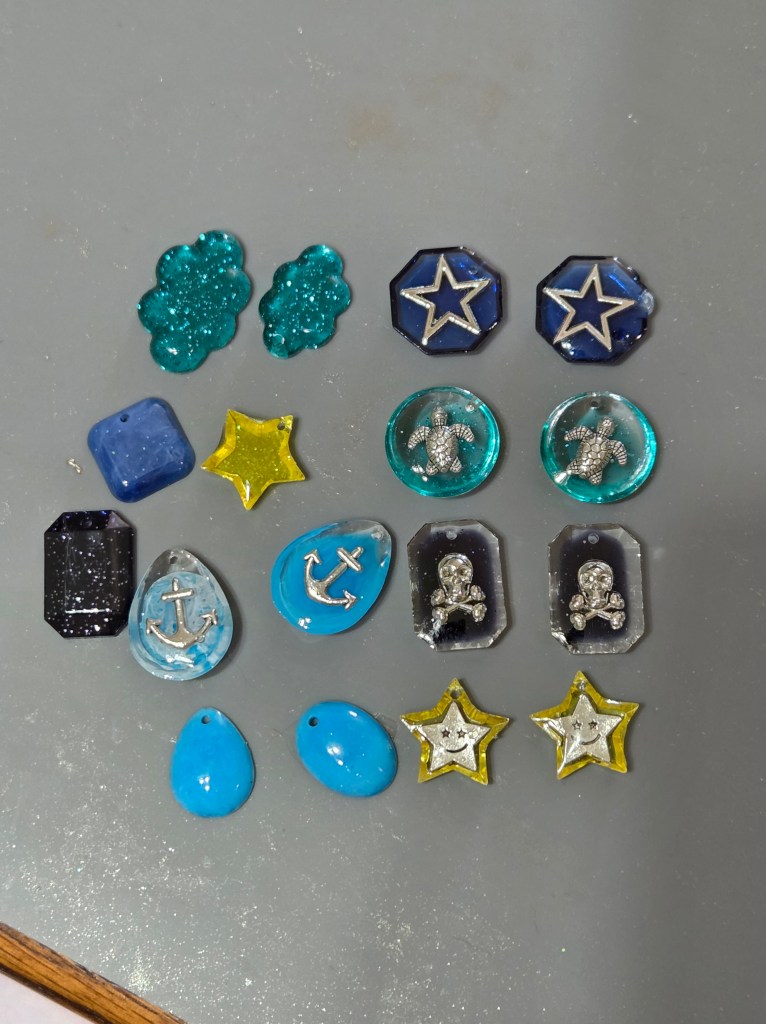
    Since then, I’ve experimented with all sorts of small projects. I made earrings for my other daughter-in-law, played around with charms from my jewelry-making supplies by clipping the loops off the top of them, and slowly figuring out what works and what absolutely does not. There have been accidents, there have been happy accidents, and there have been plenty of moments where something went straight into the trash without hesitation. 

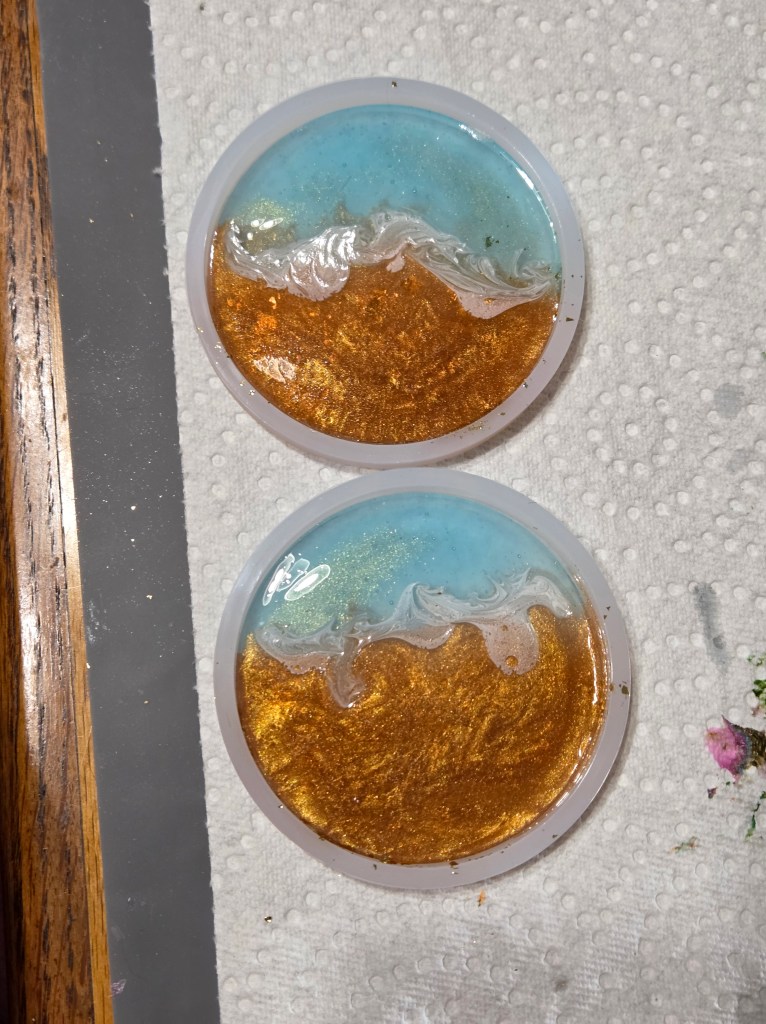
    One major lesson came when I decided to make coasters. I bought coaster molds and a large amount of UV resin, fully intending to make them for everyone in the family for Christmas. What I didn’t know until after the fact is that UV resin and coasters are not friends. The pieces warped, didn’t cure properly on the bottom, and generally looked terrible, so there will be no resin coasters, but I do now own a generous supply of UV resin.

    More recently, I’ve started experimenting with alcohol inks. I’m still learning how they behave, but more than anything, I’m learning patience. Resin is a craft that involves a lot of waiting—pour, wait, cure, wait, repeat. That’s something you don’t really see in videos, because all the waiting gets skipped or sped up. Learning to slow down has been part of the process. 

    I also made my first piece of resin paper, and I absolutely love it. I don’t know yet what I’ll use it for, but I know I’ll be making more.

    This whole process has been about experimenting, adjusting expectations, and learning as I go. Not everything turns out well. Not everything gets kept. But I’m enjoying it—and that’s what makes me want to keep going.

    I’ve decided to stick exclusively with UV resin. Epoxy isn’t a good fit for my space, airflow situation, or budget. UV resin works for what I want to do, and that’s enough.

  • Knitting: What I’ve Been Working on Lately

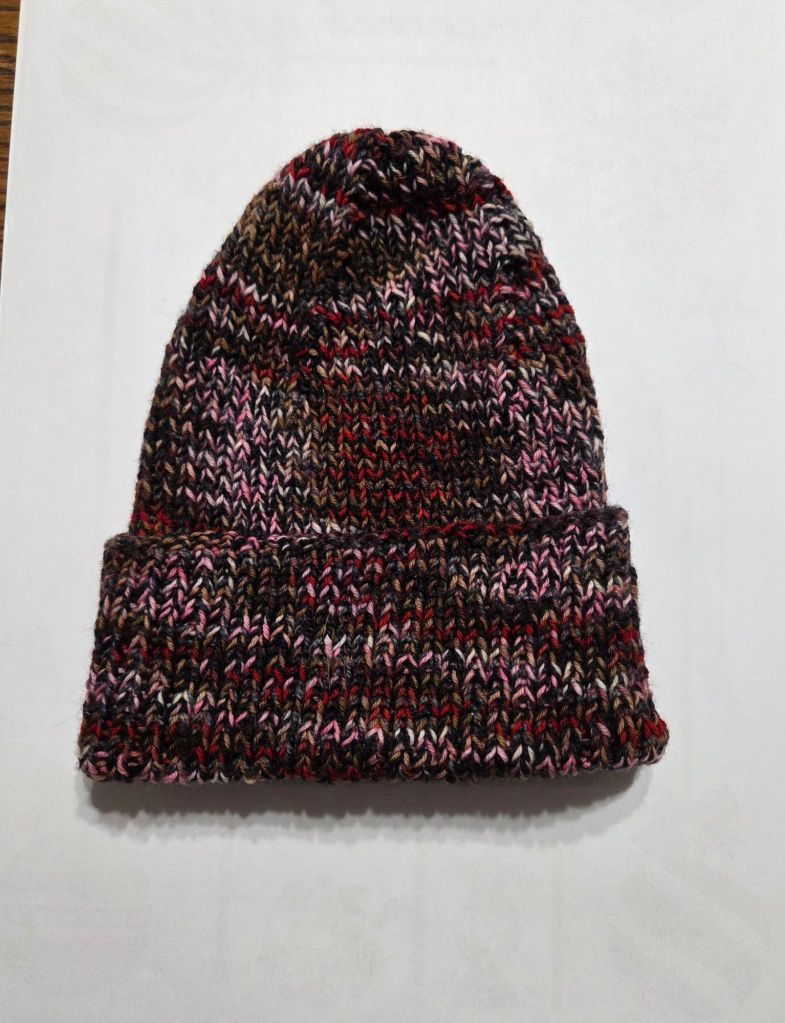
    Let’s kick this off with something I actually finished—a hat for me! That’s right, not for my brother, not for my son, just me for once.

    I have no idea what yarns these are. I think I got them from KnitPicks years ago—maybe five or six? I don’t usually buy a lot of wool yarn since I live in Central Texas and honestly don’t need it most of the year. Most of my stash is acrylic, but this year it got cold early, and I wanted something warm.

    I didn’t follow a pattern for this one. I cast on 104 stitches (I have a 24-inch head, in case you’re wondering). This is sock yarn, so holding two strands together, US 5 ChiaoGoo Red Lace needles were perfect. I used the magic loop method and worked one-by-one rib until I had about 9 inches of fabric, then started decreasing for the crown. Nothing fancy—just decreased until I got bored, then sewed it up. I love the look of one-by-one rib—it’s my favorite for hats. It’s stretchy, it fits great, and it just always looks good.

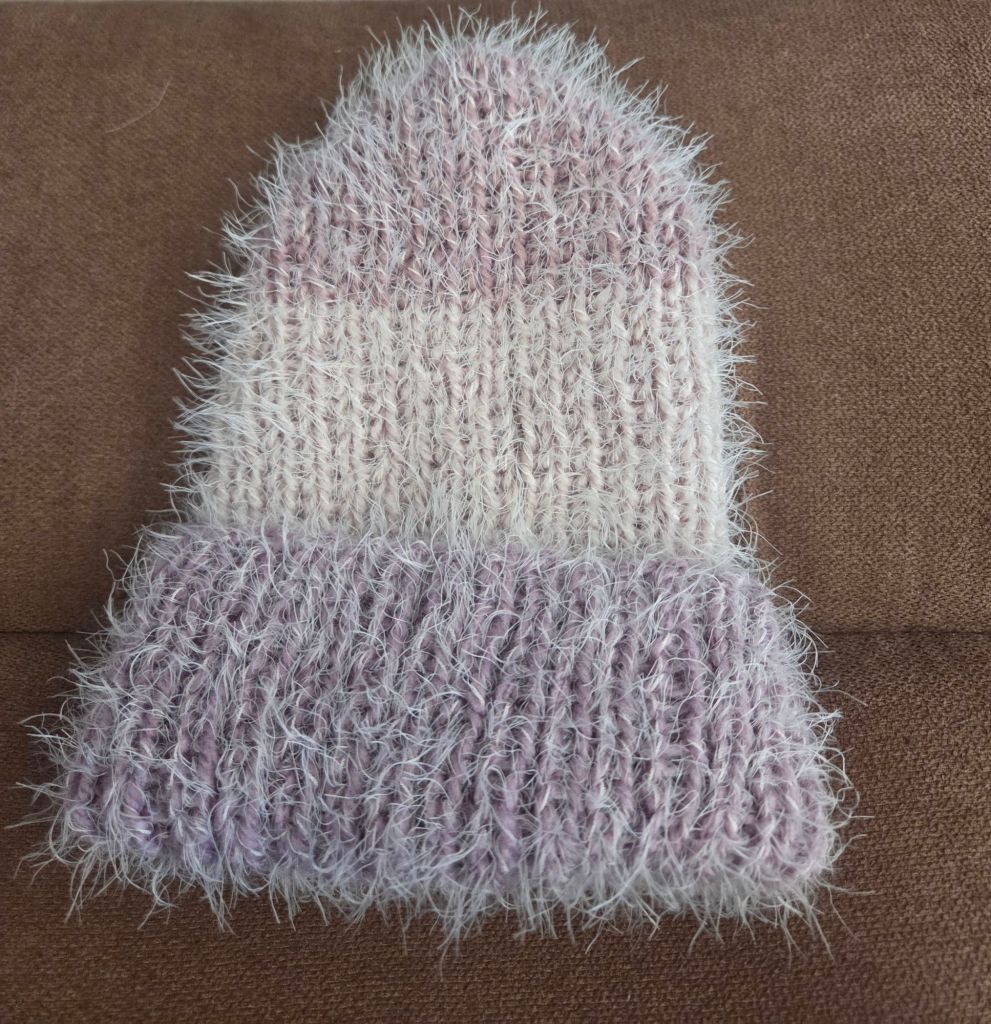
    Here’s a second hat I finished This was for my soon-to-be daughter-in-law. This yarn is Caron Latte Cakes – Lovely Layers (in one of the purple shades), and it was so soft I had to switch to my KnitPicks rainbow wood needles to keep it from sliding around. I cast on 60 stitches (her head measured 22 inches) using size 8 circular needles and just worked one-by-one rib all the way to the top. Same basic pattern as mine, just fluffier and a bit smaller. Super cozy!

    On the Needles 🧶

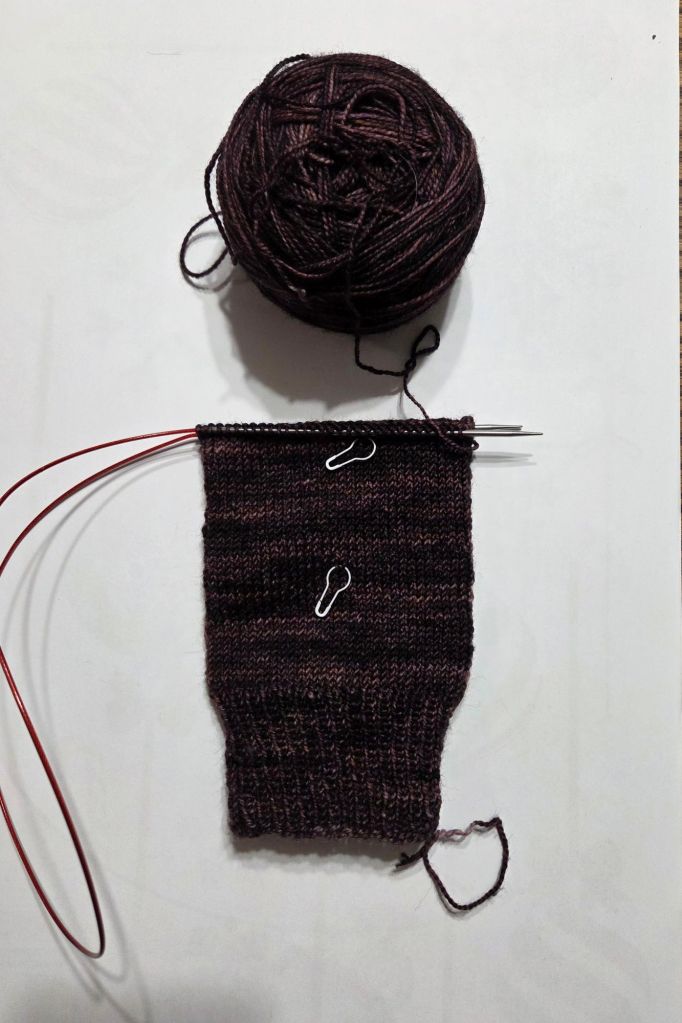
    Here’s a pair of socks I’m currently working on, again, using some wool yarn I got from KnitPicks years ago. At one point I bought a bunch of wool yarn because I had never knit with it before, and I wanted to know what it was like. So I have a bunch of small 50-gram balls that I got from KnitPicks somewhere in my stash.

    These socks are for my son who recently moved to North Dakota and is currently freezing his poor Texas-born tootsies off. I was aiming to have them finished by Christmas, but let’s be honest—that deadline has sailed. They’ll be done when they’re done, and his toes will just have to wait.

    This is just a hat I’m working on using some acrylic yarn I’ve had forever. I think it’s Lion Brand, but I have no clue what the colorway is. It’s super squishy and soft, and I’ve tried using it for a bunch of different projects—shawls, gloves, hats—you name it. Nothing ever felt right.

    Last week I tried making a plain stockinette hat that would roll at the brim, but it looked awful. It didn’t sit right or move right or something. Now I’m trying again with a 2×1 rib… and honestly? I still don’t think I’m going to like it. I just cannot find the right project for this yarn.

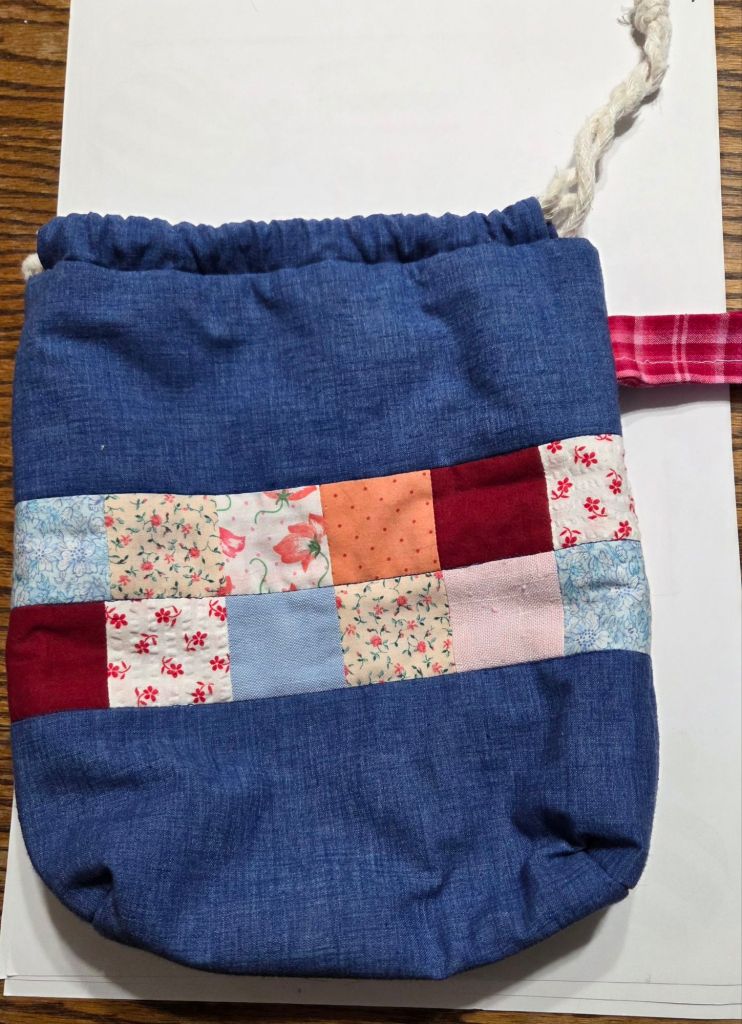
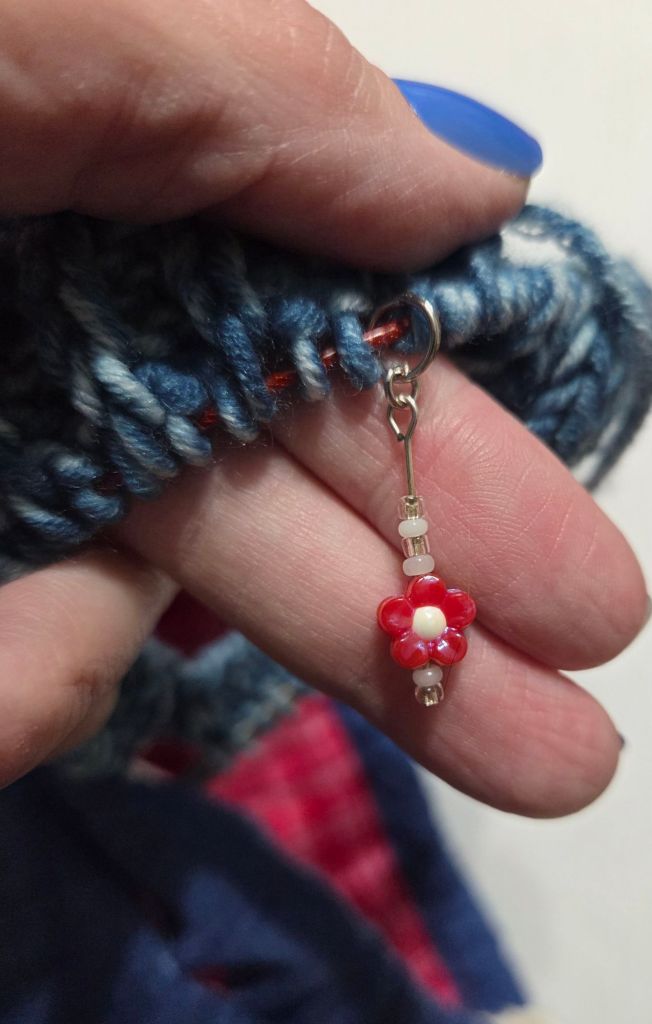
    I’m keeping it in one of the first project bags I ever made. And that little flower stitch marker? I made it too! I love those beads and haven’t been able to find more like them. I got them in a random stash from a thrift store.

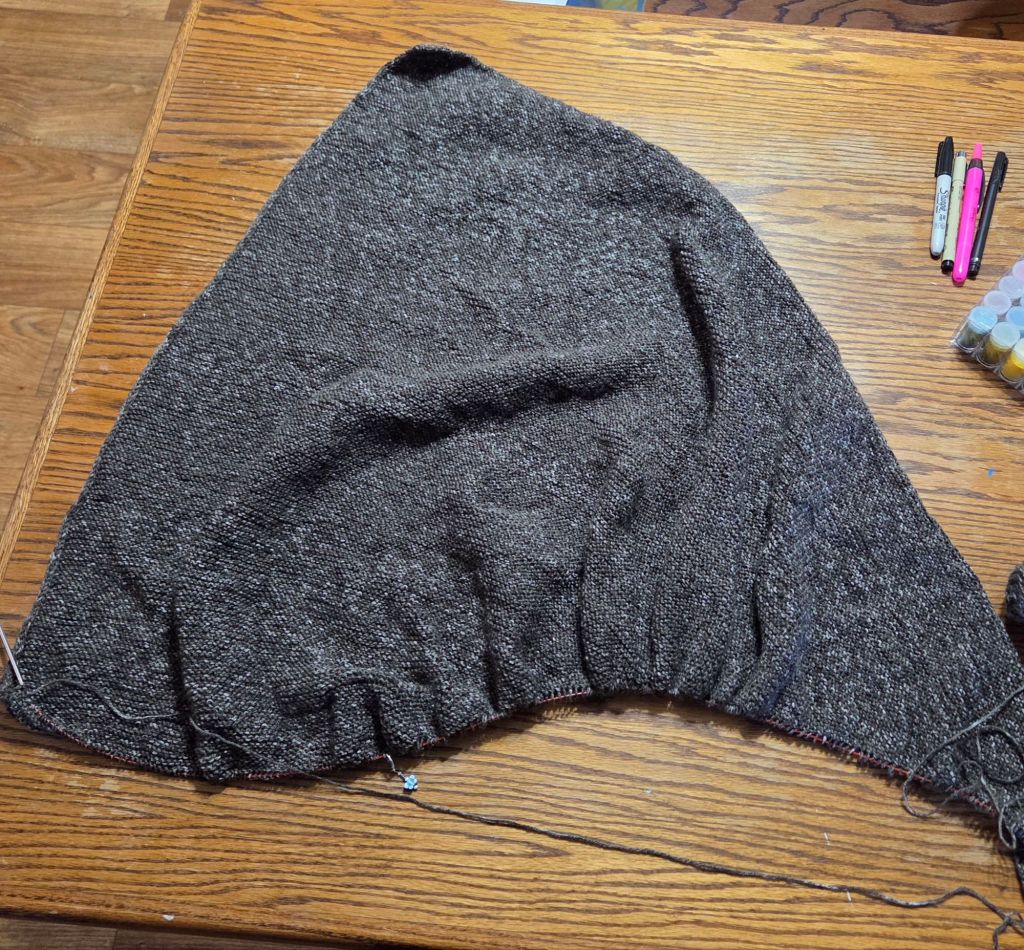
    This is the Half + Half Triangle Wrap from Purl Soho. I started it a long time ago—probably a couple of years back. I finished the first triangle, started the second, and realized something was terribly wrong. So I actually went back and read the pattern… turns out, I didn’t finish the first triangle properly.

    I tried to fix it by taking out just a few rows, but with the wrap-and-turns, I couldn’t figure it out. I’m not skilled enough for that yet, so I frogged the whole thing and started over. I’m almost done with the first triangle again now.

    The yarn is Yarn Bee Soft & Sleek DK from Hobby Lobby. It’s a heathered gray and, sadly, no longer shows up in the app. This is hands-down my favorite yarn ever—soft, lovely to work with, and perfect for hats or wraps like this. It might not be a true DK weight, maybe more of a light DK, but it’s dreamy.

    I keep this project close by all year round. It’s the one I reach for when I’m watching TV, bored, or just not feeling anything else. I can pick it up, knit a row or two, and put it back down.

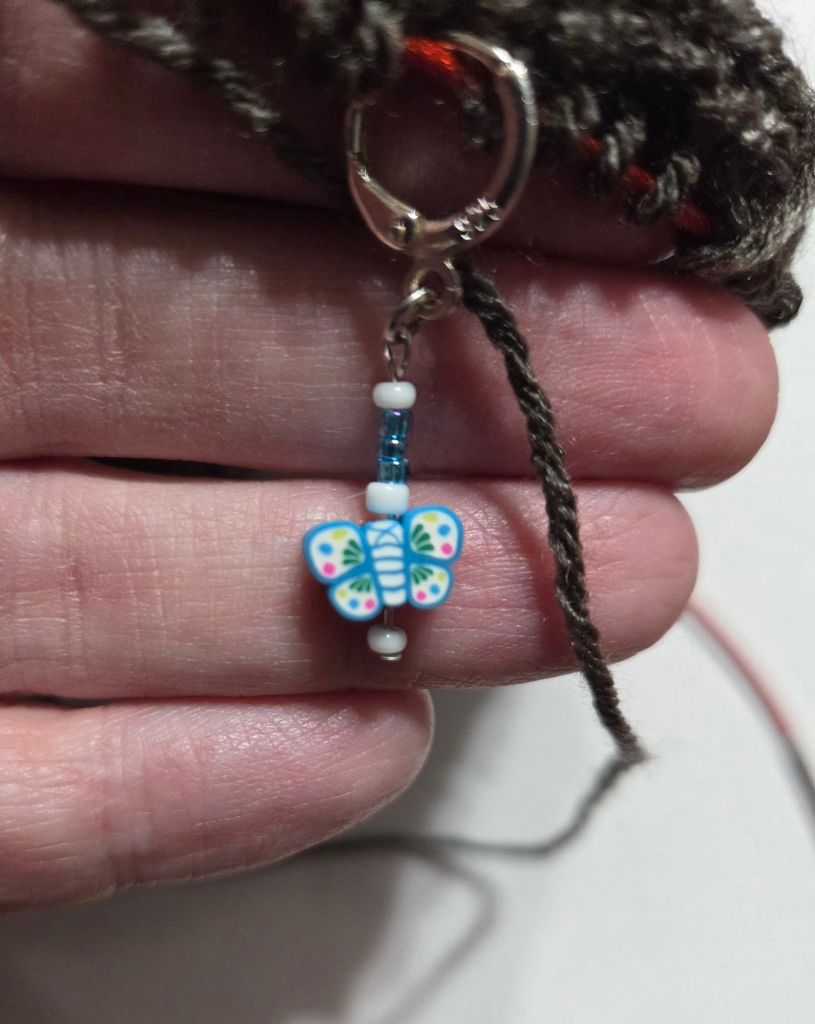
    The stitch marker I’m using is one I made using a little polymer clay butterfly bead that I got from Amazon. I love the clasp style because it’s round and fits over larger needles easily.

    The project bag is also made by me using scrap fabric that I’ve had forever. It’s roomy, squishy, and perfect for this big wrap in progress.

  • My cross stitch story

    I honestly can’t remember when I started cross-stitching—or even what my very first project was. The first one I do remember was “Jesus Knocking at the Door,” a Bucilla kit (from back in the 1990’s). I was probably 17 or 18 when I got the kit, finished it around age 19 or 20, and gave it to my mom. It’s hanging on her wall in her bedroom, still in a cheap frame with no glass, yellowed from age, and has knots all over the back. I had masking tape around the edges. It was done by a teenager who had no idea what she was doing… but I loved it.

    Years later, I picked it back up again. Around 2014 or 2015, I bought a tiger kit for my son, who loved tigers at the time. It was on black Aida, and I learned the hard way that stitching on black fabric is not my happy place. It ended up in the UFO pile, where it still lives today.

    Then one day, I stumbled onto a Flosstube video—Sarah from A Stitchin’ Mommy—and my mind was blown. I had no idea you could buy fabric in colors other than white or black. I didn’t know there were different types of fabric besides Aida. I didn’t know you could buy patterns without buying a kit, choose your own floss, stitch without a hoop or frame, or even dye your own fabric. My whole world opened up.

    Like many, I got a little carried away. I found Heaven and Earth Designs, fell in love with massive full-coverage pieces, and bought way too many giant projects I’ll never finish in my lifetime (Boho Seaside Max Color, I’m looking at you). I eventually realized that smaller patterns can bring me just as much joy—and can actually get finished.

    Today, I have close to (or maybe more than) 100 cross-stitch projects in progress, plus a dresser full of floss, fabric, and patterns. I don’t finish often, but I love every stitch. Some pieces I’ve given away, some I’ve kept but haven’t framed yet, and some… well, they’re still in time-out. Right now I’m taking a break to focus on a wedding quilt, but I still think about cross-stitch every single day. And someday soon, I’ll be back at it—probably starting another project I don’t need, but can’t resist.

  • My knitting story

    Knitting is my happy place. Seriously — hand me some yarn and needles, and I’m good for hours. I mostly knit hats for my brother (he swears he loves them… probably has 100 by now) and occasionally for my youngest son (who also “loves” them). I’m great at starting projects, not so much at finishing them — except for a pair of socks I made for my dad, which he allegedly loves. Dad, if you’re reading this, I love you to pieces… but you’re never getting another pair. I hated every single minute of making them. Never again. Right now, besides working on Find Your Fade by Andrea Mowry, I’m knitting the Half + Half Triangle Wrap by Purl Soho, and loving it. Of course, in true hot mess fashion, I got all the way to the end of the first triangle, started the second, realized I hadn’t read the finishing instructions for the first one, and had to frog the whole thing. There was no way I was picking up those stitches with the wrap & turns. So here I am, halfway through triangle one… again.

  • Cross Stitch: WIP Parade: Fall & Halloween

    Fall is here, and so are my autumn and Halloween projects. This is the first in my new WIP Parade series, where I’ll share the cross-stitch pieces currently in progress. Some are barely started, some are nearly finished, but all fit perfectly with the season.

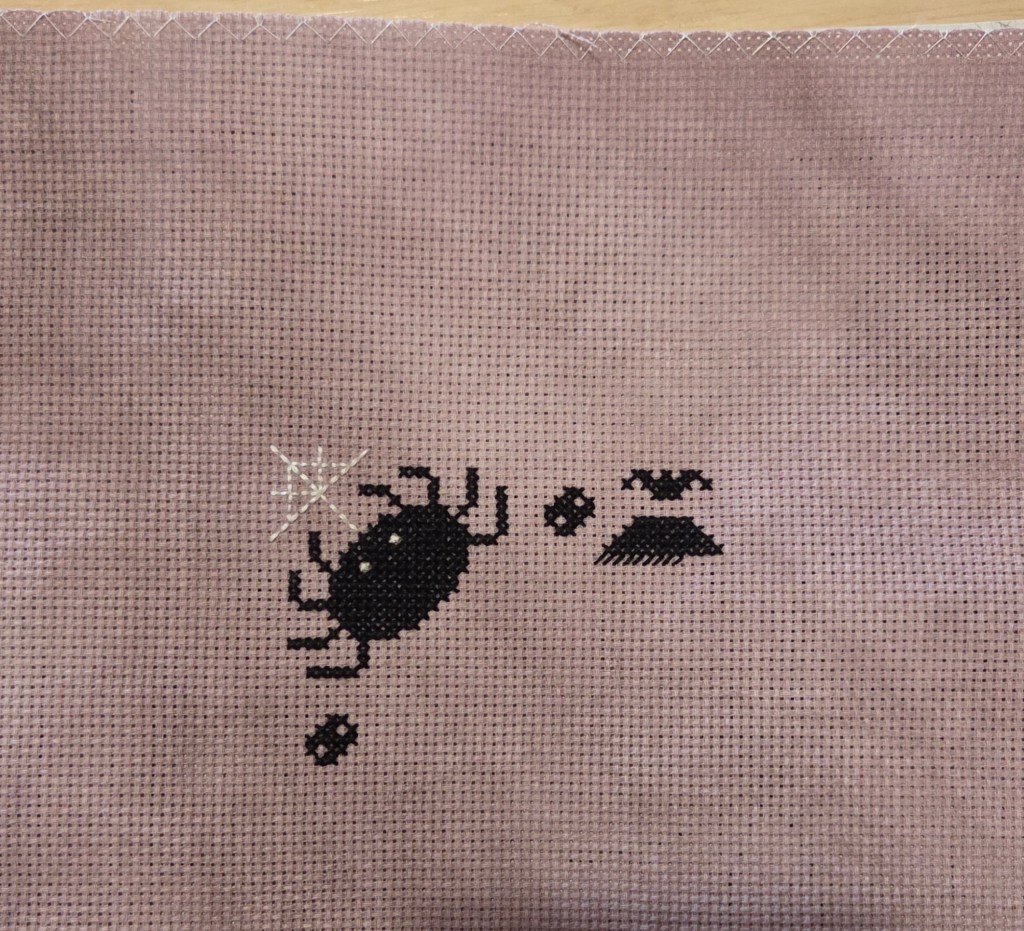
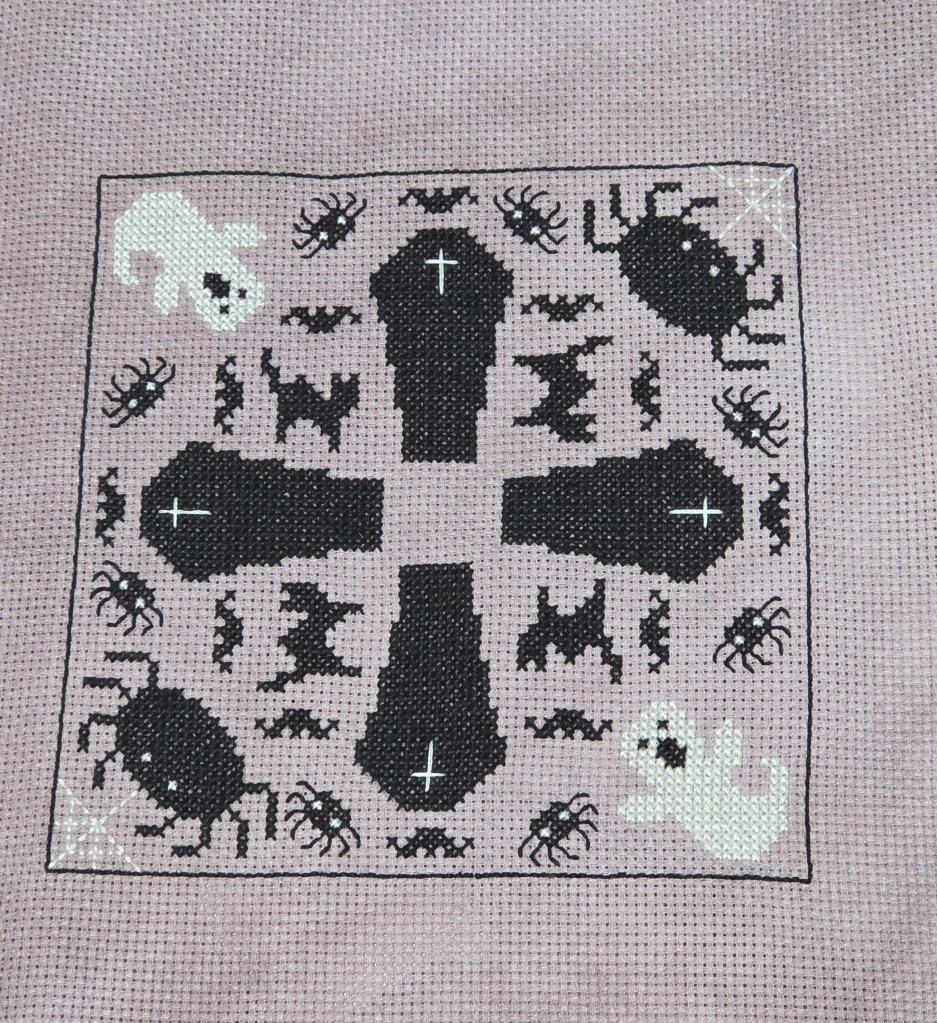
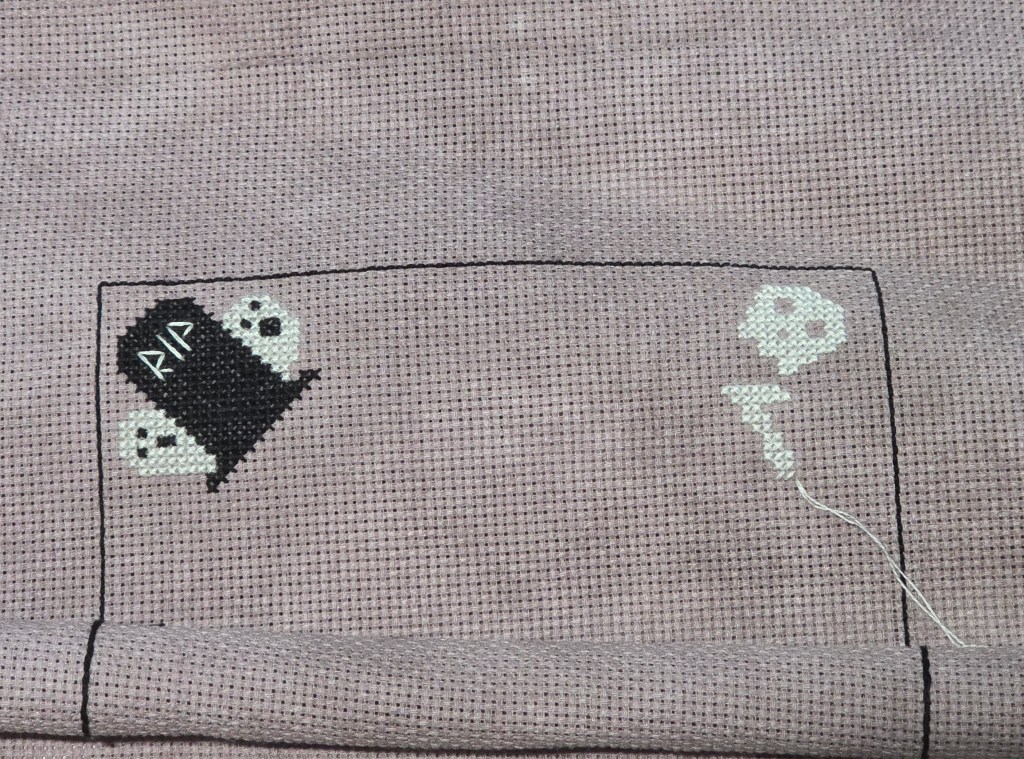
    Graveyard Biscornu

    Designer: Karen Bowen (KEB Studio Creations)

    Fabric: 14 ct Aida, hand-dyed by me

    Progress: just started — spider, web, and a few motifs stitched so far

    Notes: This is from this year’s Just CrossStitch Halloween issue. I’ve never made a biscornu before, so I thought I’d give it a try. I just started yesterday, so we’ll see how it turns out.

    UPDATE: As of November 1, 2025, here is where I am at with the biscornu. I didn’t get it done, but I got sooooo close!! Disregard the stray thread on that skull & crossbones. The thread came out of my needle and I was too lazy to try to thread it back.

    Where Did I Put My Broom

    • Designer: Modern Folk Embroidery
    • Fabric: 18 ct Aida, hand-dyed by me
    • Progress: about 98% complete — just need to finish the cauldron fill and add the frogs
    • Notes: I love Modern Folk Embroidery patterns and even have a few of his samplers. It’s so close, I don’t know why I haven’t just finished it.

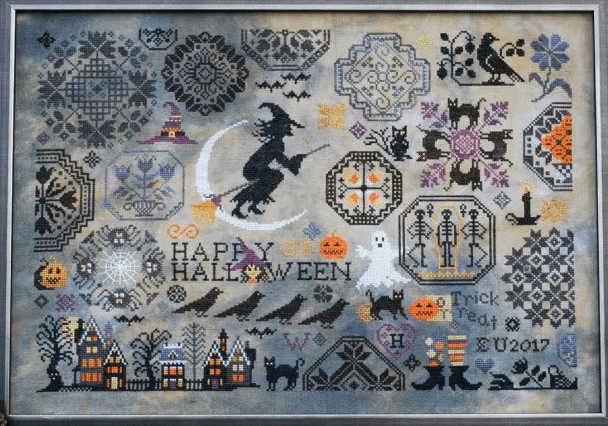
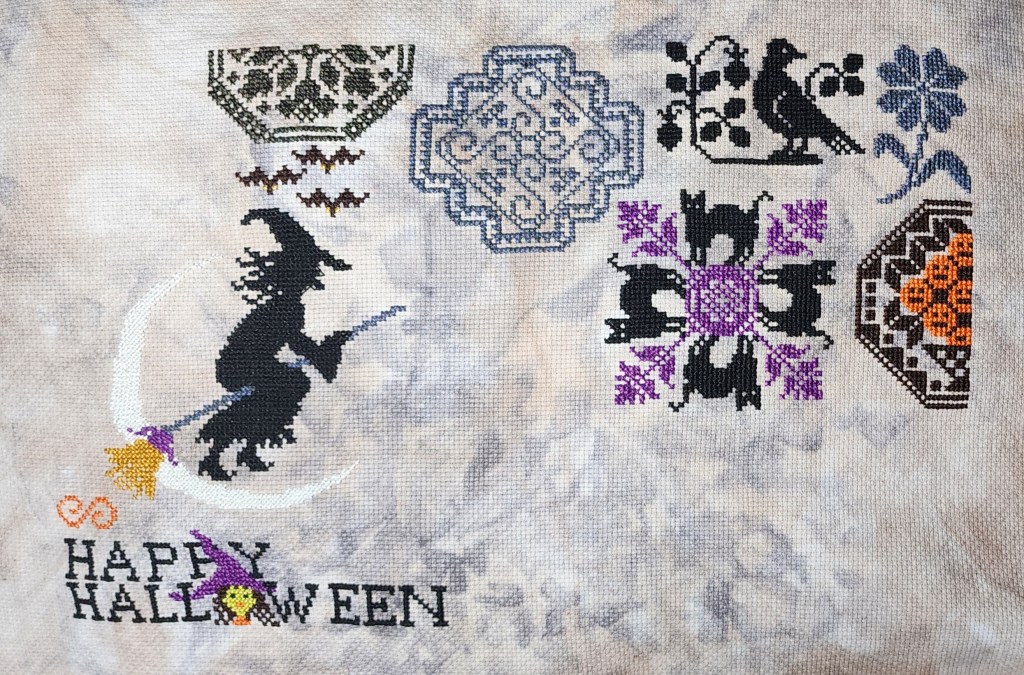
    Halloween Quaker

    Designer: Lila’s Studio

    Fabric: 18 ct Aida, hand-dyed by me (I had no idea what I was doing and it came out awesome by accident)

    Progress: about 20% — witch, text, and several motifs finished

    Notes: I was never that into Halloween (yes, even with black cats in the house) until I saw Dena from Halfstitch Cross Stitch on YouTube working on this. I had to have it. Now I love pulling it out every year in October, and honestly, it takes some willpower not to work on it all year long. Holding off feels like flexing a self-control muscle — it makes Halloween stitching even sweeter.

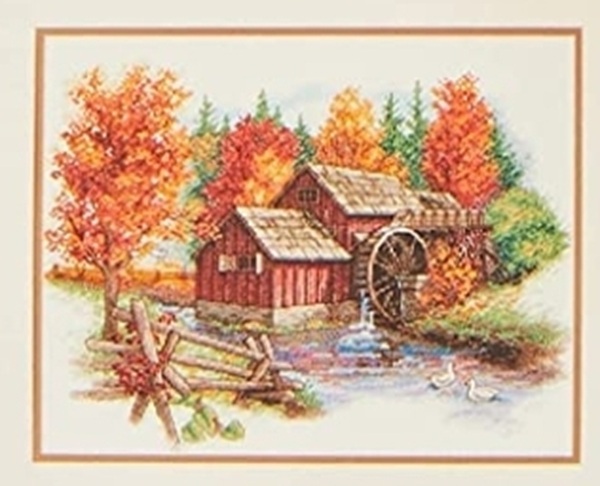
    A Colorful Past

    Artwork by: Jane Wooster Scott

    Charted by: Michele Sayetta, Heaven & Earth Designs

    Fabric: 18 ct Aida, white

    Progress: early start — working through the big black sky

    Notes: I love this picture — the fall colors are gorgeous, and there are big blocks of color that make for great mindless stitching. I first tried this on a linen (probably 25 ct) and stitched almost the entire black sky 1×1, but it was way too floppy and miserable since I stitch in hand. I restarted on 18 ct Aida, which has become my favorite fabric. It’s affordable on Amazon, and I can dye it myself if I want. The blue dots you see are just me counting to 10 with a washable fabric pen.

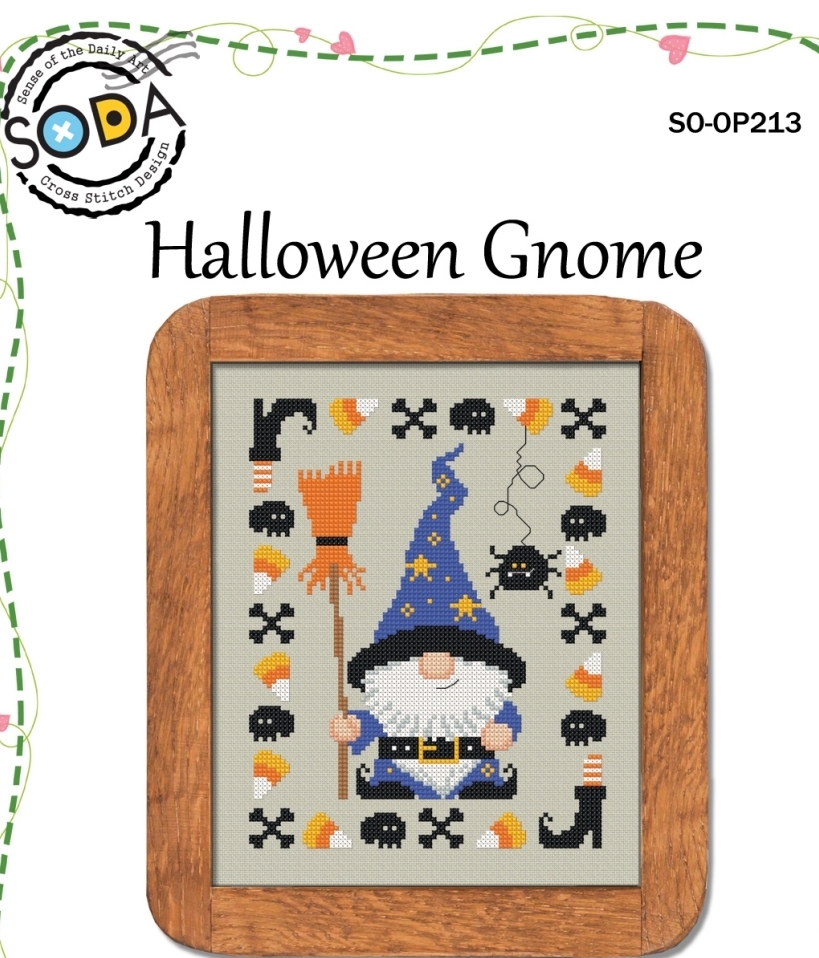
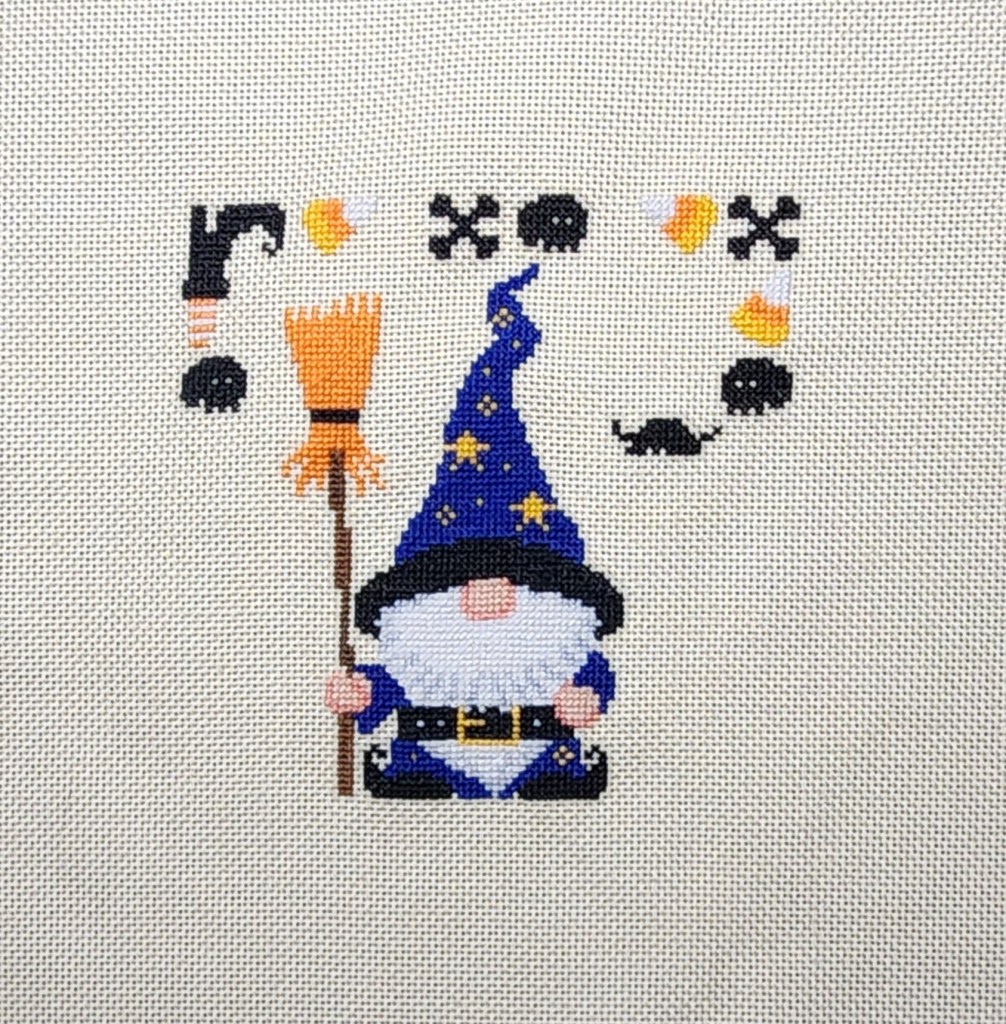
    Halloween Gnome

    Designer: Soda Stitch

    Fabric: 25ct Lugana, stitched 1×1 with DMC (same piece as Hello Fall)

    Progress: About half of the border motifs left

    Gnotes: This gnome lives at the top of the same fabric as Hello Fall. I set him aside when Halloween Quaker stole the spotlight, but one of these days he’ll get finished.

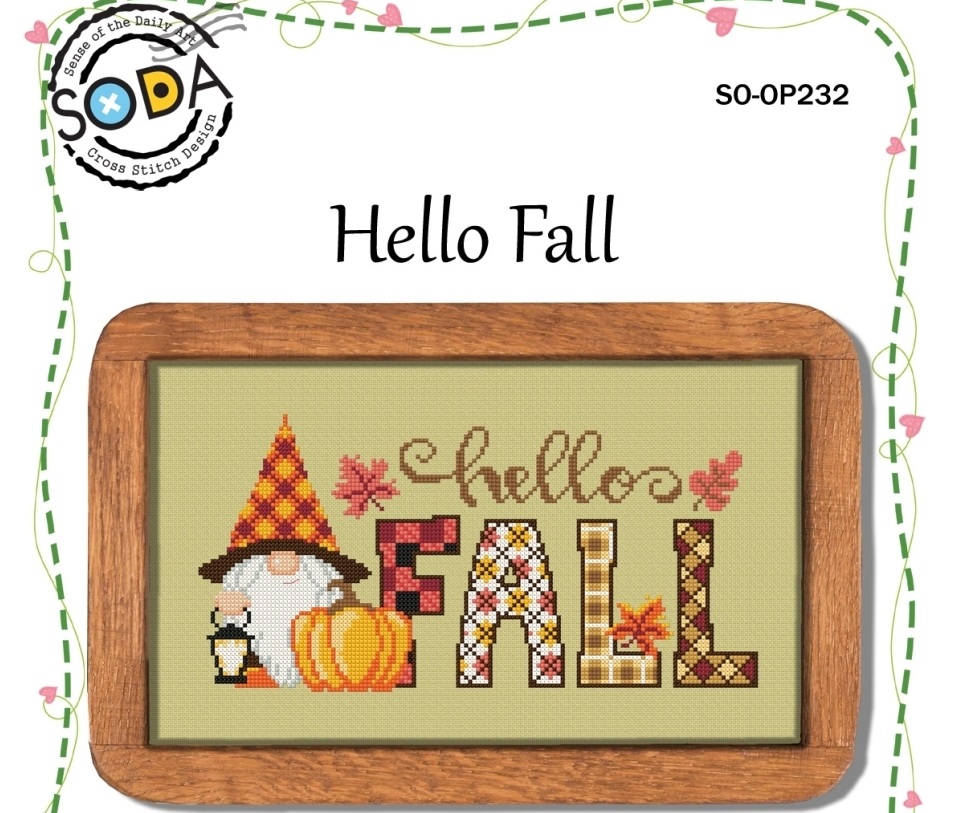
    Hello Fall

    Designer: Soda Stitch

    Fabric: 25ct Lugana, stitched 1×1 with DMC

    Progress: Finished ✨

    Gnotes: I loved stitching this — the challenge of 1×1 on tiny fabric is weirdly fun. Plus, gnomes are my weakness (I’ve got several going right now). This one just screams fall and totally nudged me into the autumn mood. I really need to get it framed or fully finished… for now it’s living in a drawer in my craft room.

    Pumpkin Carriage

    Designer: OwlForest Embroidery

    Fabric: 18ct Aida, stitched with DMC

    Progress: Finished ✨

    Notes: I LOOOOVE OwlForest Embroidery patterns. I’ve got a few of their larger ones, but this one was a small, quick finish. The colors are gorgeous, and it’s got such a fairy-tale vibe. Now I just need to figure out how I want to finish it.

    Future Fall Stitching Plans

    (A peek at patterns waiting their turn in the hoop!)

    Top row (left → right):

    • Glory of Autumn — Dimensions
    • Cornucopia — Alena Koshkina
    • Hoppy Halloween — Brooke Nolan (Brooke’s Books)

    Bottom row (left → right):

    • Mini Scaredy Cats — Heaven & Earth Designs (art by Jeff Haynie)
    • Autumn — Designer Unknown
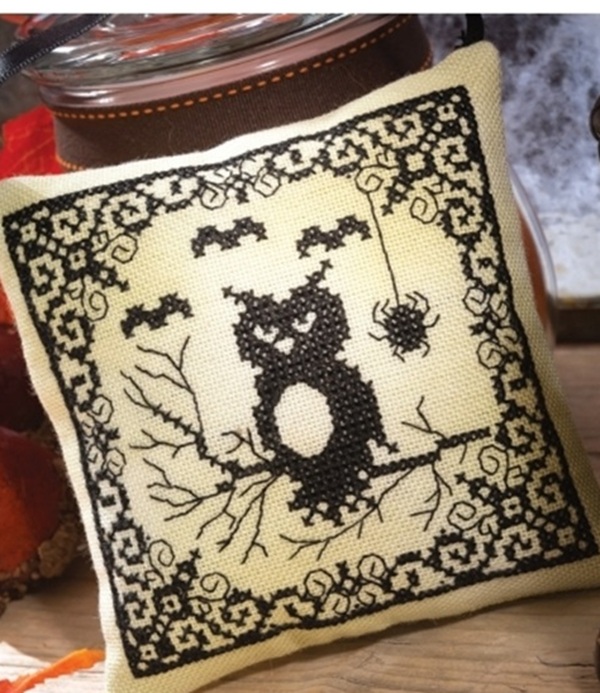
    • Halloween OwlThe World of Cross Stitching Magazine, Issue 272 (Oct 2018, freebie)

    What I Actually Worked On – Halloween/Fall 2025

    So I didn’t actually touch any of the projects in my plans… of course.

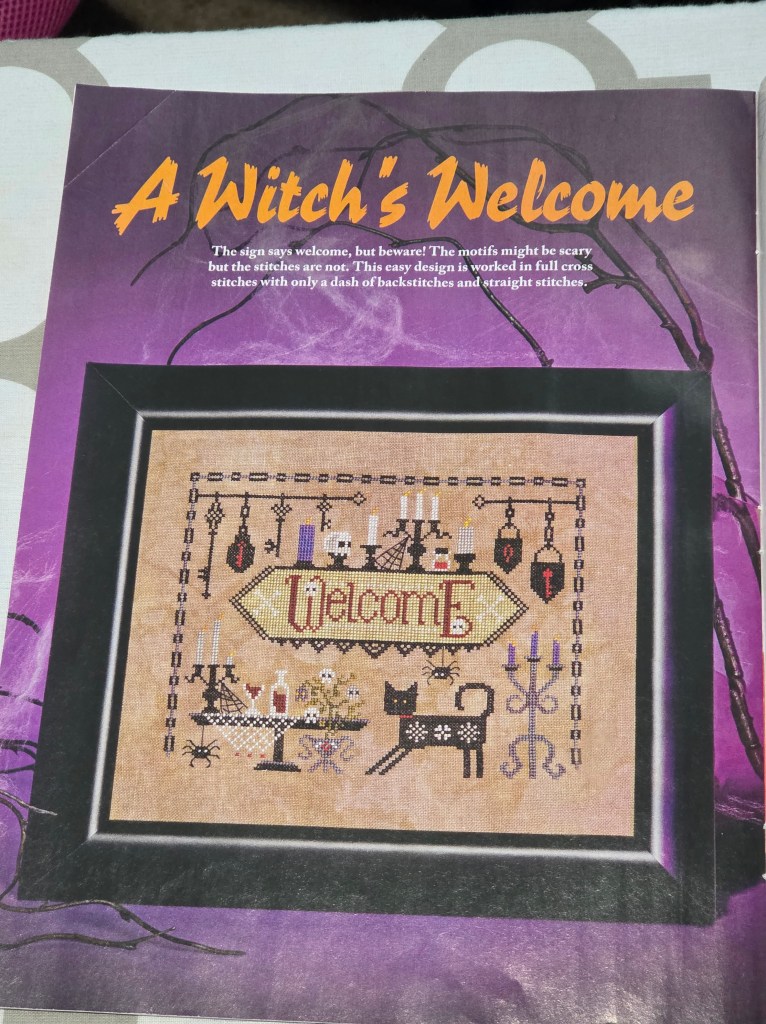
    A Witches Welcome

    Designer: Annie Craft of Dirty Annie’s

    Fabric: 18ct Aida dyed by me, stitched with DMC

    Progress: Early start – maybe 10%

    Notes: This is from the Fall 2023 Just CrossStitch magazine. I don’t know why I started it. I think I needed a break from the biscornu. But isn’t this adorable? I love it.

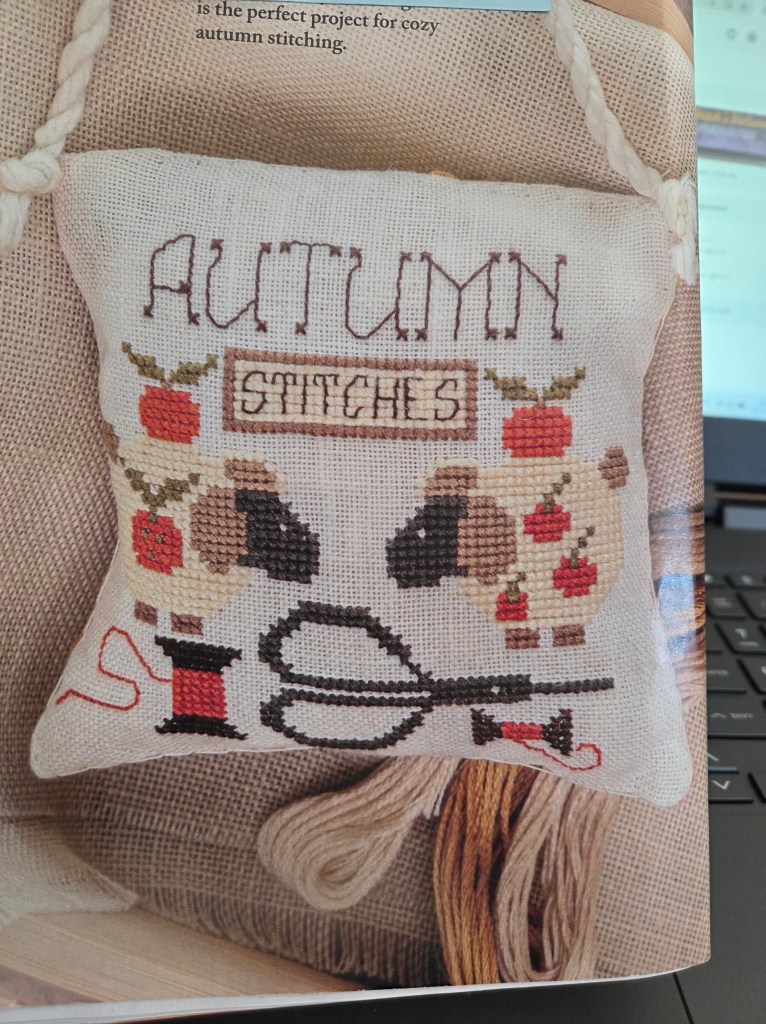
    Wooly stitches

    Designer: Nicoletta Farruto of Nikyscreations

    Fabric: 28ct lambs wool linen, stitched with DMC

    Progress: Early start – maybe 15%

    Notes: This is from the Autumn 2025 Just CrossStitch magazine. Yea, I know. A lot of stitching from the magazines. I just had never really sat down and looked through them with the idea of actually stitching anything out of them because I am always working on something else. I started this in September I believe. Right when fall started. This pattern is so adorable. I just had to do it. I don’t think I will stitch the pumpkins on the sides of the sheep though. We’ll see. I won’t pick it up again until next year, so who knows what I’ll do.

    The Sorceress

    Designer: Joan Elliott

    Fabric: 18ct Aida, dyed by me

    Progress: Early start – 1.15%

    Notes: Soooo, I was watching Catkin & Lillie the other day and she was working on this, and I had to have it. (I also got Mermaid’s Realm & A Winter’s Gift, all Joan Elliott, because of her. Thanks Kat. LOL) Sadly, I didn’t get far before Halloween was over. Now it’s time for me to work on winter holiday projects.

  • Knitting: Wondrous Dishcloth on My Needles

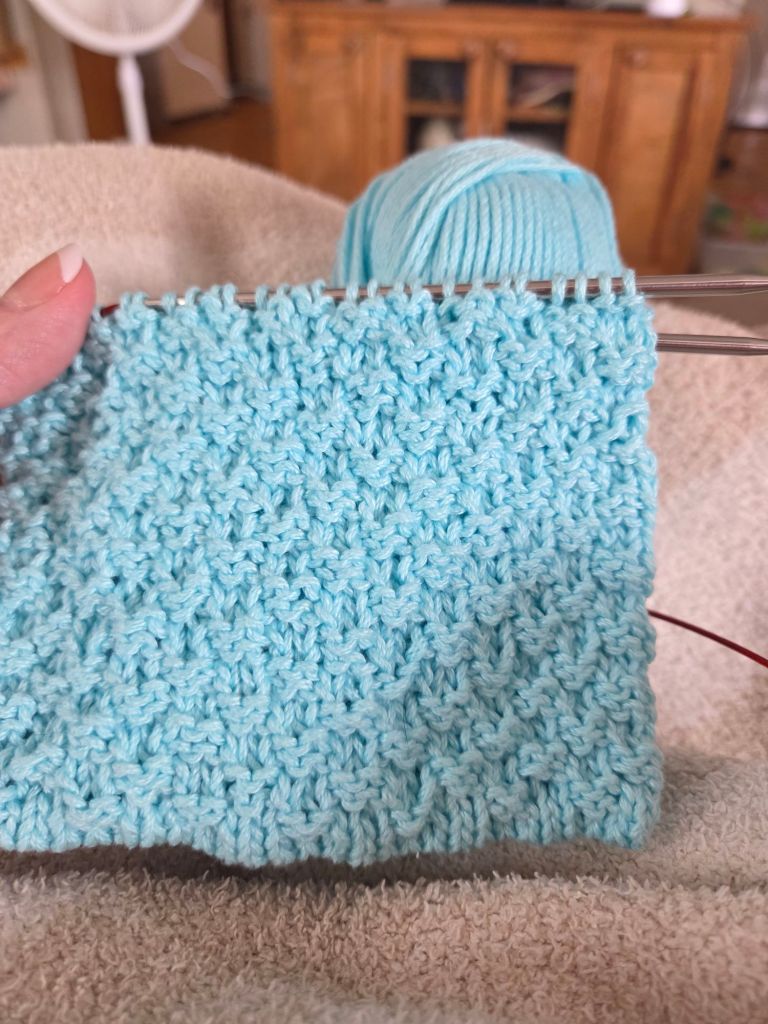
    So, lately, when I sit down for a few minutes—watching TV, taking a break—I’ve been working on this. The  Wondrous Dishcloth by Sew Sweet Violet.

    I really am not a fan of knitting with cotton yarn. But I love these dishcloths so much! They’re a little fiddly, but totally worth it.

    It took me a couple of wonky looking dishcloths to finally get it right.

    What are y’all’s favorite dishcloth patterns?

  • Sewing Machine Update

    Good news—my sewing machine is back in working order! 🎉

    But here comes the next problem… I’ve got just one more block left, and I’m completely out of batting. Since this is quilt-as-you-go, I sew the fabric directly onto a batting square for each block. I thought I cut enough, but apparently I can’t count. 🤦 So now I’ll have to dig around for something else to use—because I’m definitely not buying a whole bag of batting just for one block!

    And if that wasn’t enough, I almost had another mess with fabric too. After cutting everything, I was left with just one lonely strip. 😅

  • When Your Sewing Machine Turns on You

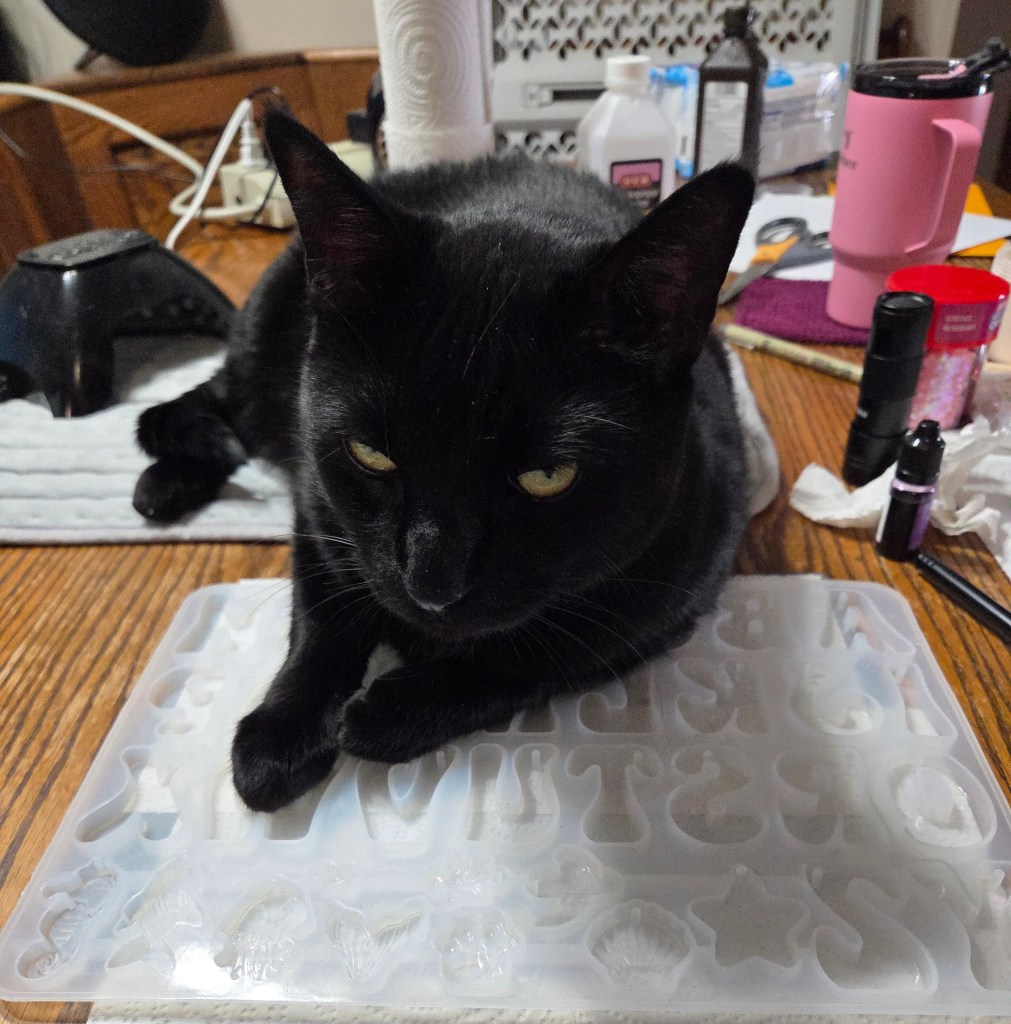
    Some days, quilting is peaceful. Not really, but I like to pretend. (Zazu likes to “help.” Zephyr needs all of my attention. And Zuri runs in and out of the craft room hissing at everyone.) Other days, your sewing machine decides to betray you in the middle of a project.

    I was sewing along on my QAYG (quilt as you go) quilt blocks that I’ve been working on for weeks. Everything was good. Or as good as can be when you’re me. Then, out of nowhere, I had a brilliant idea to see what would happen if I lowered the feed dogs.

    Now look, I’ve been using sewing machines off and on for my whole life. I know how to use them and what the different things do, but I’m in no way a professional. Also, I forget things very easily. Often. Always.

    Lowering the feed dogs did not do what I was hoping, so I raised them back up. And now my machine is broken. The thread is catching on that little arm that hangs out over the top of the bobbin case. I have removed all thread, removed the bobbin case, cleaned everything out, replaced everything, and it is still catching.
    I have another sewing machine. I love my other sewing machine. It’s my favorite. But it’s broken too. My daughter-in-law and I decided to take it apart one day to “fix it,” and now it just gives me an error message when I plug it in. I think I know what’s wrong with it, but fixing it is going to involve taking it apart again. So I bought this new machine instead! Yep… now I have two broken machines.

    And here’s the problem — this isn’t just any quilt. It’s a wedding gift for my son, and the wedding is in 62 days. Every block I finish is one step closer to getting it done on time, and every day I’m stuck without a working machine is a day I’m falling behind. Because I’m a stitchin’ hot mess. I’m sitting here with two broken sewing machines and a deadline breathing down my neck.